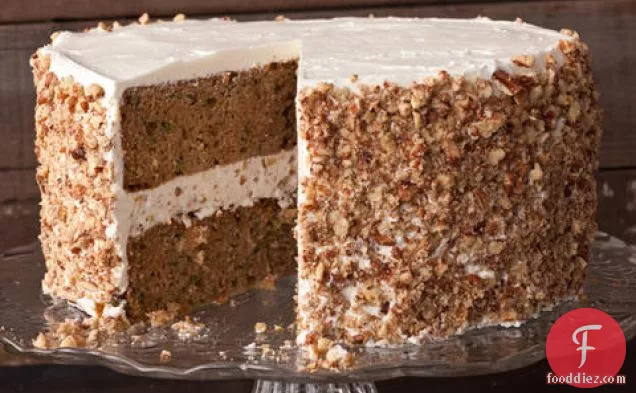
Zucchini Layer Cake with Tangy Buttercream Frosting
This recipe serves 10. One portion of this dish contains about 11g of protein, 25g of fat, and a total of 638 calories. Head to the store and pick up baking powder, whole-milk greek yogurt, eggs, and a few other things to make it today. From preparation to the plate, this recipe takes approximately 1 hour and 50 minutes.
Instructions
2
Cut out 2 (8-inch) rounds of parchment paper; set aside. Coat 2 (8-inch) cake pans with butter, place the rounds in the pans, and coat the parchment with more butter. Coat the pans and parchment with flour and tap out any excess; set aside.
Ingredients you will need![Butter]() Butter
Butter![All Purpose Flour]() All Purpose Flour
All Purpose Flour
Equipment you will use![Baking Paper]() Baking Paper
Baking Paper
3
Place the measured flour, baking powder, cinnamon, baking soda, nutmeg, and salt in a large bowl and whisk to aerate and break up any lumps; set aside.
Ingredients you will need![Baking Soda]() Baking Soda
Baking Soda![Cinnamon]() Cinnamon
Cinnamon![Nutmeg]() Nutmeg
Nutmeg![All Purpose Flour]() All Purpose Flour
All Purpose Flour![Salt]() Salt
Salt
Equipment you will use![Whisk]() Whisk
Whisk![Bowl]() Bowl
Bowl
4
Combine the eggs, sugars, oil, and vanilla in a second large bowl and whisk until the eggs are broken up and the mixture is thoroughly combined. Using a rubber spatula, fold in the flour mixture until just combined. Fold in the zucchini until evenly mixed.Divide the batter evenly between the prepared pans.
Ingredients you will need![Zucchini]() Zucchini
Zucchini![Vanilla]() Vanilla
Vanilla![All Purpose Flour]() All Purpose Flour
All Purpose Flour![Egg]() Egg
Egg![Cooking Oil]() Cooking Oil
Cooking Oil
Equipment you will use![Spatula]() Spatula
Spatula![Whisk]() Whisk
Whisk![Bowl]() Bowl
Bowl
1
Place the butter and sugar in the bowl of a stand mixer fitted with a paddle attachment and beat on low speed until the sugar is incorporated, about 30 seconds.Increase the speed to medium high and beat until the mixture is light in color, about 3 minutes. Stop the mixer and scrape down the sides of the bowl and the paddle.Return the mixer to medium-high speed and add the vanilla and salt.
Ingredients you will need![Vanilla]() Vanilla
Vanilla![Butter]() Butter
Butter![Sugar]() Sugar
Sugar![Salt]() Salt
Salt
Equipment you will use![Stand Mixer]() Stand Mixer
Stand Mixer![Bowl]() Bowl
Bowl
2
Add the yogurt 1/3 cup at a time until all of it has been added, then continue mixing until the frosting is evenly combined and light in texture, about 3 minutes. (It’s very important that the yogurt is at room temperature, or the frosting will seize and form clumps.)For the filling, transfer 1 1/4 cups of the frosting to a medium bowl and mix in 2/3 cup of the pecans; set aside.To frost the cake, place a layer on an upside-down cake pan. Evenly spread all of the nut filling over the top of the layer, then place the second cake layer on top, cut-side down. (This way you have a really smooth, even surface to frost.) Using an offset spatula or long, thin knife, spread the remaining frosting evenly over the top and sides of the cake. Using your hands, gently press the remaining 1 1/3 cups pecans into the frosting around the sides of the cake. (It’s helpful to do this over a baking sheet to catch any falling pecans.) Carefully slide 2 long, flat spatulas under the cake from opposite directions, lift the cake off the cake pan, and transfer it to a serving plate. If you don’t plan to eat the cake within 4 hours, tent it with plastic wrap and refrigerate it for up to 3 days. To serve, let the cake sit at room temperature for about 45 minutes to take the chill off before slicing.
Ingredients you will need![Frosting]() Frosting
Frosting![Pecans]() Pecans
Pecans![Spread]() Spread
Spread![Yogurt]() Yogurt
Yogurt![Wrap]() Wrap
Wrap
Equipment you will use![Offset Spatula]() Offset Spatula
Offset Spatula![Baking Sheet]() Baking Sheet
Baking Sheet![Plastic Wrap]() Plastic Wrap
Plastic Wrap![Cake Form]() Cake Form
Cake Form![Spatula]() Spatula
Spatula![Knife]() Knife
Knife![Bowl]() Bowl
Bowl
Equipment


Ingredients
2teaspoons![baking powder]() baking powder1teaspoon
baking powder1teaspoon![baking soda]() baking soda710milliliters
baking soda710milliliters![bleached cake flour, such as Softasilk, plus more as needed]() bleached cake flour, such as Softasilk, plus more as needed237milliliters
bleached cake flour, such as Softasilk, plus more as needed237milliliters![packed dark brown sugar]() packed dark brown sugar4larges
packed dark brown sugar4larges![eggs, at room temperature]() eggs, at room temperature237milliliters
eggs, at room temperature237milliliters![granulated sugar]() granulated sugar2teaspoons
granulated sugar2teaspoons![ground cinnamon]() ground cinnamon1teaspoons
ground cinnamon1teaspoons![freshly ground nutmeg]() freshly ground nutmeg227grams
freshly ground nutmeg227grams![cups pecans (about , toasted and finely chopped]() cups pecans (about , toasted and finely chopped414milliliters
cups pecans (about , toasted and finely chopped414milliliters![powdered sugar]() powdered sugar0teaspoons
powdered sugar0teaspoons![fine salt]() fine salt237milliliters
fine salt237milliliters![plain whole-milk Greek yogurt, at room temperature]() plain whole-milk Greek yogurt, at room temperature10servings
plain whole-milk Greek yogurt, at room temperature10servings![Unsalted butter, for coating the pans]() Unsalted butter, for coating the pans1Tbsp
Unsalted butter, for coating the pans1Tbsp![vanilla extract]() vanilla extract237milliliters
vanilla extract237milliliters![vegetable oil]() vegetable oil710milliliters
vegetable oil710milliliters![14 ounces zucchini (about 3 to 4 medium zucchini), ends trimmed and grated on the large holes of a box grater (about]() 14 ounces zucchini (about 3 to 4 medium zucchini), ends trimmed and grated on the large holes of a box grater (about
14 ounces zucchini (about 3 to 4 medium zucchini), ends trimmed and grated on the large holes of a box grater (about
 baking powder1teaspoonbaking soda710milliliters
 bleached cake flour, such as Softasilk, plus more as needed237milliliters
 packed dark brown sugar4larges
 eggs, at room temperature237milliliters
 granulated sugar2teaspoons
 ground cinnamon1teaspoons
 freshly ground nutmeg227grams
 cups pecans (about , toasted and finely chopped414milliliters
 powdered sugar0teaspoons
 fine salt237milliliters
 plain whole-milk Greek yogurt, at room temperature10servings
 Unsalted butter, for coating the pans1Tbsp
 vanilla extract237milliliters
 vegetable oil710milliliters
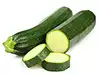 14 ounces zucchini (about 3 to 4 medium zucchini), ends trimmed and grated on the large holes of a box grater (about
DifficultyExpert
Ready In1 h, 50 m.
Servings10
Health Score5
Dish TypesSide Dish
Related recipes
Angelica's Carne Asada Tacos
Nopalitos Con Huevos Breakfast Tacos
Lotus Root Bhaji (Dry Curry)
Grilled Rib-Eye of Beef With Warm Potatoes, Bacon, and Leeks
Magazine

Your Inner Chef with Taylor Swift's Top 3 Recipes from Her Beloved NYC Hangout

20 Mouthwatering Recipes You Need to Try Today!

Master the Art of Making Perfect Pancakes with This Foolproof Recipe

The Science Behind Red Wine: Its Surprising Health Benefits and Potential Risks

12 Wine Cocktails for a Sophisticated Twist

Sip, Swirl, and Celebrate: Toasting to National Wine Day on May 25th

National Drink Wine Day on February 18

Celebrating Souffle Day with Delectable Delights

Indulge in the Delightful Flavor of Oyster Soup on Its Special Day!

Celebrating World Nutella Day


Your Inner Chef with Taylor Swift's Top 3 Recipes from Her Beloved NYC Hangout
12 Wine Cocktails for a Sophisticated Twist
Celebrating Souffle Day with Delectable Delights
Indulge in the Delightful Flavor of Oyster Soup on Its Special Day!

These Super Recipes for Your Football Party!

The Secrets Behind 3 Classic Comfort Food Recipes
10 Warming Recipes to Beat the Cold Days

A Collection of 15 Noodle Soup Recipes to Warm Your Soul

The Rich and Flavorful Black Food Traditions in Netflix's 'High on the Hog'