The popularity of frozen pops
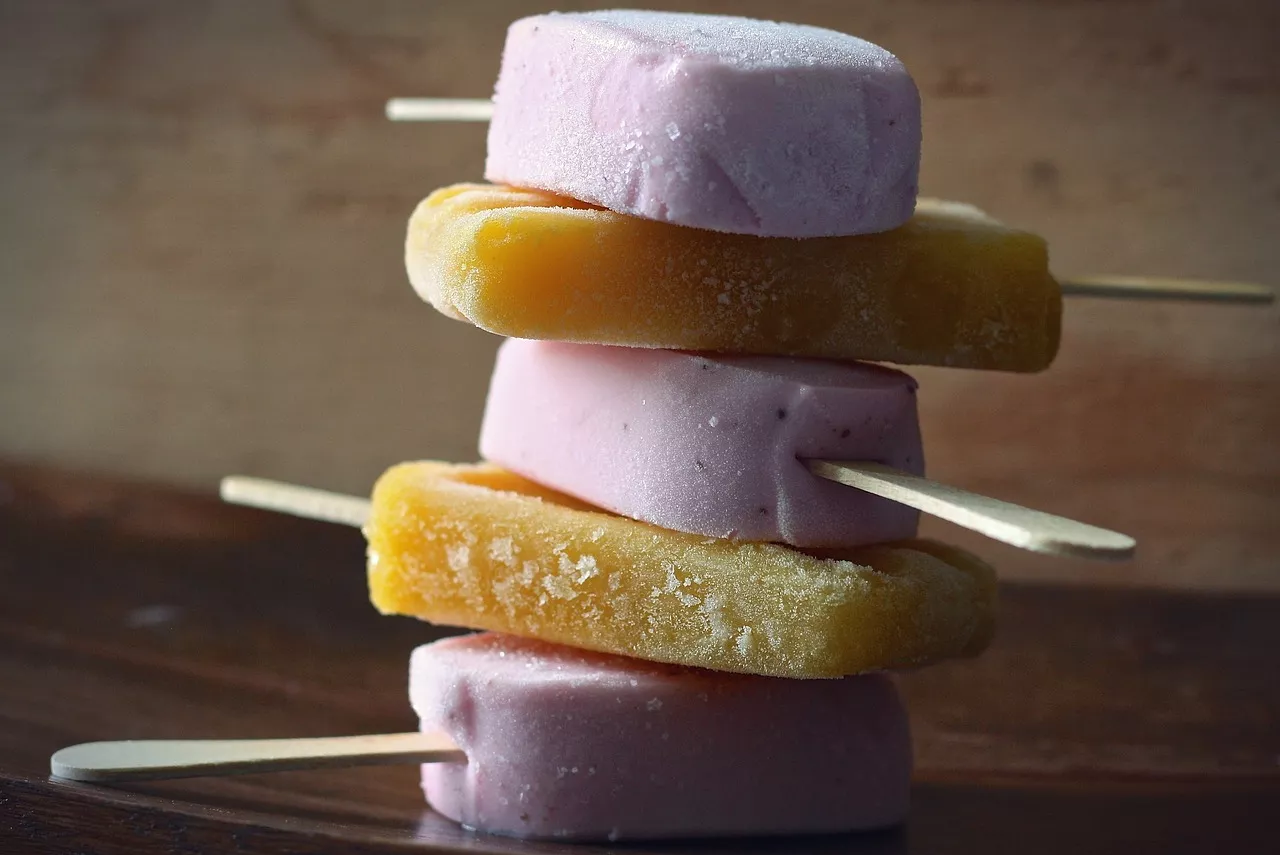
Frozen pops have become a beloved treat for people of all ages. The appeal lies in their refreshing nature and the endless possibilities for flavor combinations. Whether enjoyed on a hot summer day or as a delightful dessert after a meal, frozen pops are a go-to choice for many. The convenience of having a portable, frozen treat that can be easily enjoyed anywhere adds to their popularity. With the growing interest in homemade and healthier options, making frozen pops at home has gained significant traction. Creating your own frozen pops allows you to have full control over the ingredients, flavors, and presentation, ensuring a delightful and personalized experience. It's time to join the frozen pop revolution and discover the joy of making them at home.
Benefits of making frozen pops at home
There are numerous benefits to making your own frozen pops at home. First and foremost, you have complete control over the ingredients that go into your pops. You can choose high-quality, fresh fruits, natural sweeteners, and even incorporate nutritious add-ins like yogurt or chia seeds. This allows you to create healthier versions of your favorite flavors, free from artificial additives and excessive sugar. Additionally, making your own frozen pops allows you to experiment with unique flavor combinations that may not be readily available in stores. You can let your creativity run wild and tailor the pops to your preferences. Furthermore, homemade frozen pops are a cost-effective option compared to store-bought ones. With a few basic ingredients and popsicle molds, you can create a batch of delicious pops that will last for weeks. Finally, making frozen pops at home is a fun and rewarding activity that can be enjoyed by the whole family. It provides an opportunity to bond, unleash your culinary skills, and create lasting memories together.
Necessary equipment for making frozen pops
To embark on your frozen pop journey, you'll need a few essential tools and equipment. The most important item is popsicle molds, which come in various shapes and sizes. Look for molds that are made of BPA-free, food-grade materials for safe and easy removal of the pops. Silicone molds are a popular choice due to their flexibility and ease of use. You'll also need popsicle sticks or handles, which can be inserted into the molds to create a convenient handle for enjoying the pops. Other useful tools include a blender or food processor for pureeing fruits, a mixing bowl, a whisk or spoon for stirring the ingredients, and a measuring cup or scale for precise measurements. Once you have gathered all the necessary equipment, you're ready to start creating your frozen masterpieces.
Choosing the right ingredients for flavorful pops
The key to mouthwatering frozen pops lies in selecting the right ingredients. When it comes to fruits, opt for ripe and seasonal varieties for the best flavor. Freshly squeezed juices can also be used to infuse your pops with vibrant natural flavors. If you prefer a creamier texture, consider adding ingredients like yogurt, coconut milk, or almond milk. For sweetening, choose natural alternatives like honey, maple syrup, or agave nectar. These sweeteners add a touch of sweetness without overpowering the natural flavors. To add a nutritional boost, you can incorporate superfoods like spinach, kale, or berries rich in antioxidants. Don't be afraid to experiment with different ingredients and combinations to find your perfect balance of flavors. The possibilities are endless, and you're only limited by your imagination.
Basic steps for creating frozen pops
Creating your own frozen pops is a straightforward process that can be broken down into a few simple steps. First, gather all your ingredients and equipment. Prepare the fruits by washing and peeling them if necessary. If you're using any additional ingredients like yogurt or milk, measure them out accordingly. Next, puree the fruits in a blender or food processor until smooth. If desired, you can strain the puree to remove any seeds or pulp. In a mixing bowl, combine the pureed fruits with the sweeteners and any additional ingredients, such as yogurt or milk. Whisk or stir the mixture until everything is well incorporated. Then, carefully pour the mixture into the popsicle molds, leaving a small gap at the top to allow for expansion during freezing. Insert the popsicle sticks or handles into the molds. Place the molds in the freezer and let them freeze for at least four to six hours, or until solid. Once the pops are fully frozen, remove them from the molds by running warm water over the bottom of the molds for a few seconds. Gently pull the popsicles out, and they're ready to be enjoyed!
Creative and unique flavor combinations
Now that you know the basics, it's time to explore the exciting world of flavor combinations for your frozen pops. The possibilities are endless, and you can let your creativity shine. For a refreshing and tangy option, try combining lemon and lime juice with a hint of mint. If you're a fan of tropical flavors, blend pineapple, mango, and coconut milk for a taste of paradise. For a burst of berry goodness, mix strawberries, blueberries, and raspberries with a touch of honey. If you're a chocolate lover, create a decadent treat by combining cocoa powder, almond milk, and a swirl of peanut butter. Don't forget to experiment with different herbs and spices like basil, lavender, or cinnamon to add an extra layer of complexity to your pops. The key is to balance the flavors and have fun with the process. Let your taste buds guide you, and you'll be amazed at the delicious combinations you can create.
Tips and tricks for perfecting your frozen pops
While making frozen pops is relatively simple, a few tips and tricks can help you achieve the perfect results every time. First, make sure to blend the fruits thoroughly to achieve a smooth consistency. Straining the puree can help remove any unwanted textures. When pouring the mixture into the molds, avoid overfilling to prevent any spillage or difficulty in unmolding the pops later on. It's also a good idea to tap the molds gently on the countertop to release any air bubbles. To prevent the popsicles from sticking to the molds, run warm water over the bottom of the molds for a few seconds before removing them. If you're looking for a quicker freezing time, try using smaller popsicle molds or placing the molds in the coldest part of your freezer. Lastly, don't be afraid to get creative with toppings and add-ins. Consider dipping the frozen pops in melted chocolate and then rolling them in crushed nuts or coconut flakes for added texture and flavor. The possibilities for customization are endless, so let your imagination run wild.
Healthy and nutritious alternatives for frozen pops
If you're looking for healthier alternatives for your frozen pops, there are plenty of nutritious options to explore. Instead of using regular sugar as a sweetener, try using natural alternatives like stevia or monk fruit extract. These options provide sweetness without the added calories or blood sugar spikes. For a creamy texture, consider using Greek yogurt or coconut milk as a base instead of traditional dairy products. You can also incorporate fruits and vegetables with high nutritional value, such as spinach, kale, or avocado. These additions not only enhance the nutritional profile of your pops but also add vibrant colors and unique flavors. Don't be afraid to experiment with different combinations and discover your favorite guilt-free frozen treats.
Decorative and presentation ideas for serving frozen pops
Elevate your frozen pops to a whole new level with creative and eye-catching presentation ideas. One simple yet effective way to enhance the visual appeal is by using popsicle sticks with decorative handles. These can be found in various designs and colors, adding a touch of fun and whimsy to your popsicles. Another option is to use edible flowers or herbs as garnishes. These natural decorations not only make your popsicles look stunning but also infuse them with subtle flavors. You can also experiment with layering different flavors to create a visually striking effect. Pour one flavor into the mold, let it freeze partially, and then add another layer of a different flavor on top. Repeat this process to achieve beautiful, multi-colored popsicles. For an added wow factor, consider dipping the frozen popsicles in melted chocolate and then sprinkling them with colorful sprinkles or crushed nuts. These decorative elements will make your homemade frozen pops a feast for the eyes as well as the taste buds.
Conclusion
Congratulations! You have now mastered the art of creating delicious frozen pops at home. With this ultimate guide, you have learned the popularity of frozen pops, the benefits of making them at home, the necessary equipment, choosing the right ingredients, the basic steps for creation, creative flavor combinations, tips and tricks for perfecting your pops, healthy alternatives, and decorative presentation ideas. Armed with this knowledge, you can explore endless possibilities, experiment with flavors, and create frozen delights that will impress your friends and family. So grab your popsicle molds, unleash your inner chef, and get ready to embark on a frozen flavor journey like no other. From tangy lemon-lime to indulgent chocolate, the world of homemade frozen pops is waiting for you to explore. Let your creativity soar and enjoy the satisfaction of creating delicious frozen treats right in your own kitchen. Get ready to elevate your frozen pops to a whole new level of flavor and fun!

 10 Delicious and Easy Recipes the Whole Family Will Love
 Uncovering the Rich History of Indian Cuisine


