Gelatin Molded Champagne Bottle
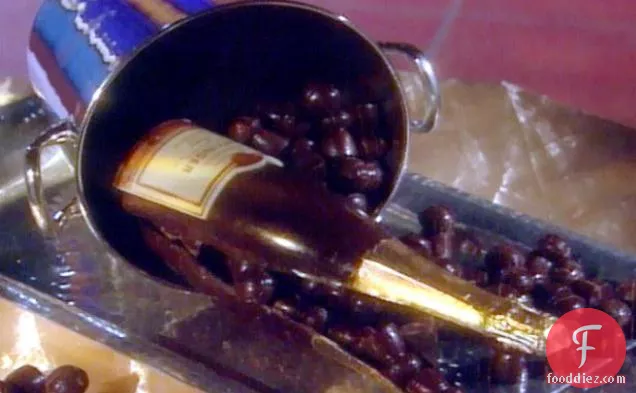
Gelatin Molded Champagne Bottle is a gluten free, dairy free, and fodmap friendly recipe with 1 servings. This beverage has 17583 calories, 743g of protein, and 402g of fat per serving. This recipe covers 62% of your daily requirements of vitamins and minerals. It can be enjoyed any time, but it is especially good for new year eve. A mixture of powdered food coloring, chocolate plastic, fruit-flavored liqueur, and a handful of other ingredients are all it takes to make this recipe so flavorful. From preparation to the plate, this recipe takes about 2 hours.
Instructions
1
Combine the gelatin and water in the bowl and let bloom.
Ingredients you will need![Gelatin]() Gelatin
Gelatin![Water]() Water
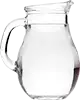
Water
Equipment you will use![Bowl]() Bowl
Bowl
2
Add the sugar and place the bowl over a double boiler. Melt until the gelatin and sugar are dissolved and the mixture is smooth and clear. Skim the top, if necessary, and discard.
Ingredients you will need![Gelatin]() Gelatin
Gelatin![Sugar]() Sugar
Sugar
Equipment you will use![Double Boiler]() Double Boiler
Double Boiler![Bowl]() Bowl
Bowl
3
To make the container in which you will create the gelatin bottle mold, you will need a piece of aluminum flashing that is at least 3 inches longer than the height of the bottle and wide enough to wrap around the bottle 1 1/2 times. Curve the flashing, creating a container the bottle can lay in with at least 1-inch of space on all sides. Seal the open sides completely with duct tape and tape a wooden spoon or spatula along the top of the flashing on each side to add extra rigidity to the mold. The final product should look like the template.
Ingredients you will need![Gelatin]() Gelatin
Gelatin![Wrap]() Wrap
Wrap
Equipment you will use![Wooden Spoon]() Wooden Spoon
Wooden Spoon![Spatula]() Spatula
Spatula
4
Pour a 1-inch thick layer of the hot gelatin liquid into the bottom of the mold.
Ingredients you will need![Gelatin]() Gelatin
Gelatin
5
Place in the refrigerator and allow to set. When the gelatin is very firm, remove from the refrigerator.
Ingredients you will need![Gelatin]() Gelatin
Gelatin
6
Heat the remaining gelatin so it is a liquid consistency if it has started to solidify.
Ingredients you will need![Gelatin]() Gelatin
Gelatin
8
Pour the remaining gelatin liquid over the bottle, covering the top by about 1-inch.
Ingredients you will need![Gelatin]() Gelatin
Gelatin
9
Let this sit until the gelatin begins to gel. Move it to the refrigerator and allow to set until the gelatin is very firm. When it is firm, remove it from the refrigerator cut the duct tape on the ends and peel away the aluminum flashing so you are left with only the bottle completely encased in gelatin. Using a sharp paring knife, slice the mold the long way into two identical halves.
Ingredients you will need![Gelatin]() Gelatin
Gelatin
Equipment you will use![Knife]() Knife
Knife
11
For the Chocolate Bottle: Fill one half of the mold with chocolate.
Ingredients you will need![Chocolate]() Chocolate
Chocolate
12
Place a wire rack so it sits on top of (not inside) a deep roasting pan. Overturn the filled mold onto the wire rack. The excess chocolate will drain from the mold. Allow the chocolate to set slightly. This is important because once the chocolate starts to harden, about 5 minutes, scrape the edge clean with a paring knife. When the chocolate sets, it shrinks or retracts from the sides of the mold. A clean edge will keep it from sticking and cracking as it shrinks. You can place the mold in the refrigerator for several minutes to help the chocolate to harden. Repeat with the other half of the mold. Unmold both chocolate bottle halves by pulling the gelatin away from the chocolate. If you are not going to fill the bottle with candies or truffles, use tempered chocolate to glue the two halves together to create the bottle.
Ingredients you will need![Chocolate]() Chocolate
Chocolate![Candy]() Candy
Candy![Gelatin]() Gelatin
Gelatin
Equipment you will use![Roasting Pan]() Roasting Pan
Roasting Pan![Wire Rack]() Wire Rack
Wire Rack![Knife]() Knife
Knife
13
For the Decorated Label: You can either paint the label freehand or use a silk screen kit. Either way, start by using a rolling pin to roll the chocolate plastic about 1/8-inch thick. If you are going to paint freehand, use a paring knife to cut a square the size of the label you would like to make.
Ingredients you will need![Chocolate]() Chocolate
Chocolate![Roll]() Roll
Roll
Equipment you will use![Rolling Pin]() Rolling Pin
Rolling Pin![Knife]() Knife
Knife
14
Mix up your paints by combining the cocoa butter and the powdered food coloring in a 6-to-1 ratio, respectively.
Ingredients you will need![Food Color]() Food Color
Food Color![Butter]() Butter
Butter![Cocoa Powder]() Cocoa Powder
Cocoa Powder
15
Add the cocoa butter slowly until you achieve a medium thickness. The best way to store and warm your paints while you are using them is in a yogurt machine. Use a paintbrush to paint the label.
Ingredients you will need![Butter]() Butter
Butter![Yogurt]() Yogurt
Yogurt![Cocoa Powder]() Cocoa Powder
Cocoa Powder
16
If you are using a silk screen kit, start by melting the unsweetened chocolate over a double boiler. Hold the silk screen over the rolled out chocolate plastic. Using a plastic scraper with a straight edge, apply about a teaspoon of melted chocolate to the silkscreen, and gently pull it across the design. Carefully lift off the silk screen. It will dry almost immediately. Using a paring knife, cut out the label.
Ingredients you will need![Unsweetened Baking Chocolate]() Unsweetened Baking Chocolate
Unsweetened Baking Chocolate![Chocolate]() Chocolate
Chocolate
Equipment you will use![Double Boiler]() Double Boiler
Double Boiler![Knife]() Knife
Knife
1
Chocolate is tempered so that after it has been melted, it retains its gloss and hardens again without becoming chalky and white (that happens when the molecules of fat separate and form on top of the chocolate). There are a variety of ways to temper.
Ingredients you will need![Chocolate]() Chocolate
Chocolate
2
One of the easiest ways to temper chocolate is to chop it into small pieces and then place it in the microwave for 30 seconds at a time on high power until most of the chocolate is melted. Be very careful not to overheat it. (The temperature of dark chocolate should be between 88 and 90 degrees F, slightly warmer than your bottom lip. It will retain its shape even when mostly melted. White and milk chocolates melt at a temperature approximately 2 degrees F less because of the amount of lactose they contain.) Any remaining lumps will melt in the chocolate's residual heat. Use an immersion blender or whisk to break up the lumps. Usually, chocolate begins to set, or crystallize, along the side of the bowl. As it sets, mix those crystals into the melted chocolate to temper it. A glass bowl retains heat well and keeps the chocolate tempered longer.
Ingredients you will need![Dark Chocolate]() Dark Chocolate
Dark Chocolate![Chocolate]() Chocolate
Chocolate![Lactose]() Lactose
Lactose![Milk]() Milk
Milk
Equipment you will use![Immersion Blender]() Immersion Blender
Immersion Blender![Microwave]() Microwave
Microwave![Whisk]() Whisk
Whisk![Bowl]() Bowl
Bowl
3
Another way to temper chocolate is called seeding. In this method, add small pieces of unmelted chocolate to melted chocolate. The amount of unmelted chocolate to be added depends on the temperature of the melted chocolate, but is usually 1/4 of the total amount. It is easiest to use an immersion blender for this, or a whisk.
Ingredients you will need![Chocolate]() Chocolate
Chocolate
Equipment you will use![Immersion Blender]() Immersion Blender
Immersion Blender![Whisk]() Whisk
Whisk
4
The classic way to temper chocolate is called tabliering. Two thirds of the melted chocolate is poured onto a marble or another cold work surface. The chocolate is spread out and worked with a spatula until its temperature is approximately 81 degrees F. At this stage, it is thick and begins to set. This tempered chocolate is then added to the remaining non-tempered chocolate and mixed thoroughly until the mass has a completely uniform temperature. If the temperature is still too high, part of the chocolate is worked further on the cold surface until the correct temperature is reached. This is a lot of work, requires a lot of room, and makes a big mess.
Ingredients you will need![Chocolate]() Chocolate
Chocolate![Spread]() Spread
Spread
Equipment you will use![Spatula]() Spatula
Spatula
5
A simple method of checking tempering, is to apply a small quantity of chocolate to a piece of paper or to the point of a knife. If the chocolate has been correctly tempered, it will harden evenly and show a good gloss within a few minutes.
Ingredients you will need![Chocolate]() Chocolate
Chocolate
Equipment you will use![Knife]() Knife
Knife
Equipment


Ingredients


DifficultyExpert
Ready In2 hrs
Servings1
Health Score50
Related recipes
Chewy Walnut-Apricot Candies
Candy Cane Sugar Cubes
Meringue Candy Canes
Salmon with Lemon, Capers, and Rosemary
Magazine

Your Inner Chef with Taylor Swift's Top 3 Recipes from Her Beloved NYC Hangout

20 Mouthwatering Recipes You Need to Try Today!

Master the Art of Making Perfect Pancakes with This Foolproof Recipe

The Science Behind Red Wine: Its Surprising Health Benefits and Potential Risks

12 Wine Cocktails for a Sophisticated Twist

Sip, Swirl, and Celebrate: Toasting to National Wine Day on May 25th

National Drink Wine Day on February 18

Celebrating Souffle Day with Delectable Delights

Indulge in the Delightful Flavor of Oyster Soup on Its Special Day!

Celebrating World Nutella Day
Uncover the Secrets of Lip-Smacking Recipes for Outdoor Cooking
Unveiling the Science Behind Cultured Meat

Our Ultimate Recipes Guide for 2023-2024

Australian Cuisine Exploring the Flavors Down Under

From Asado to Empanadas Food Culture Argentina
Beyond Gyros and Feta Food Culture of Greece
From Bean to Cup Crafting Your Own Delicious Coffee
From Tangier to Marrakech Morocco's Culinary Hotspots
From Injera to Kitfo Culinary Traditions of Ethiopia

10 Easy and Delicious Soup Recipes for a Cozy Winter Night
Your Inner Chef with Taylor Swift's Top 3 Recipes from Her Beloved NYC Hangout
20 Mouthwatering Recipes You Need to Try Today!
Sip, Swirl, and Celebrate: Toasting to National Wine Day on May 25th
National Drink Wine Day on February 18
Indulge in the Delightful Flavor of Oyster Soup on Its Special Day!

These Super Recipes for Your Football Party!

The Secrets Behind 3 Classic Comfort Food Recipes
Recipes to Spice Up Your February Menu

Top 20+ Must-Try Recipes Dominating February 2024