Jack-O'-Lantern
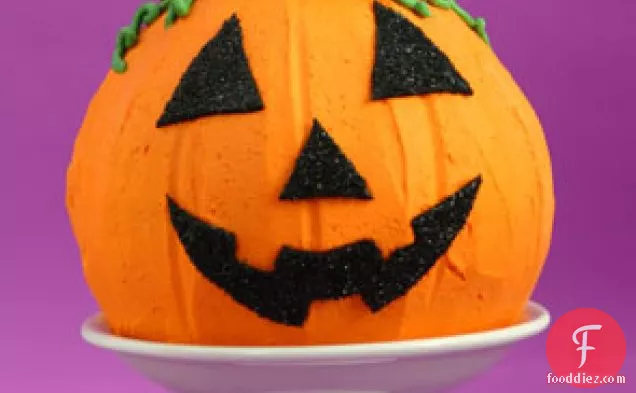
Need a dairy free side dish? Jack-O'-Lantern could be an outstanding recipe to try. One serving contains 73 calories, 0g of protein, and 2g of fat. This recipe serves 12. This recipe covers 0% of your daily requirements of vitamins and minerals. From preparation to the plate, this recipe takes roughly 45 minutes. If you have waffle ice cream cone, fondant, decorating sugar, and a few other ingredients on hand, you can make it.
Instructions
1
Preheat the oven to 350°F. Lightly grease the bottom of each cake pan, then line it with waxed paper or parchment paper and lightly grease and flour the bottom and sides. Divide the batter between the pans and bake the cakes until a toothpick inserted in the center comes out clean, 30 minutes. Cool the cakes completely in the pans on cooling racks and then turn them out onto the racks.
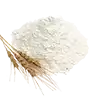
Ingredients you will need![All Purpose Flour]() All Purpose Flour
All Purpose Flour
Equipment you will use![Baking Paper]() Baking Paper
Baking Paper![Toothpicks]() Toothpicks
Toothpicks![Oven]() Oven
Oven![Cake Form]() Cake Form
Cake Form
2
While the cakes are cooling, transfer 1 cup of the frosting to a glass measuring cup. Tint it green (see Decorating Tips). Tint the remaining frosting orange.
Ingredients you will need![Frosting]() Frosting
Frosting![Orange]() Orange
Orange
Equipment you will use![Measuring Cup]() Measuring Cup
Measuring Cup
3
Using an offset spatula, spread a thin layer of the orange frosting over the flat surface of 1 cake. Invert the second cake on top of the first, joining the flat surfaces of both domes together.
Ingredients you will need![Frosting]() Frosting
Frosting![Orange]() Orange
Orange![Spread]() Spread
Spread
Equipment you will use![Offset Spatula]() Offset Spatula
Offset Spatula
4
Transfer the assembled cake to the cardboard base, if using, or a cake plate. Cover the cake completely with the rest of the orange frosting.
Ingredients you will need![Frosting]() Frosting
Frosting![Orange]() Orange
Orange![Base]() Base
Base
5
To make rib indentations as shown in the photo, hold a plastic straw against the cake, curving it from bottom to top. Lift it off, reposition it, and press again. Repeat all around the cake. (Gently incise the ribs with a skewer if you don't have a straw.)
Ingredients you will need![Ribs]() Ribs
Ribs
Equipment you will use![Drinking Straws]() Drinking Straws
Drinking Straws![Skewers]() Skewers
Skewers
6
For the stem, invert the ice cream cone and, using a clean spatula, cover it with the green frosting; add more frosting at the top to give the stem a curved tip.
Ingredients you will need![Ice Cream Cone]() Ice Cream Cone
Ice Cream Cone![Frosting]() Frosting
Frosting
Equipment you will use![Spatula]() Spatula
Spatula
8
Fit a decorating bag with a coupler and the leaf tip; add 1 cup of the green frosting to the bag. Referring to the photo, pipe several leaves around the base of the stem. Hold the bag at an angle next to the stem. Squeeze out some frosting, allowing it to fan into a wide base, then decrease the pressure and slowly pull the tip away, lifting slightly, to form a point.
Ingredients you will need![Frosting]() Frosting
Frosting![Base]() Base
Base
10
Place the tip where you want the tendril to begin. Using even pressure, squeeze out some frosting and move the tip to draw the tendril. Release the pressure and lift the tip when the tendril is the desired length.
Ingredients you will need![Frosting]() Frosting
Frosting
11
Using a rolling pin, roll the fondant to 1/8 inch thick. Referring to the photo and using a small, sharp knife, cut out the features. For the eyes, cut 2 triangles about 1 1/2 inches wide at the base and 1 1/2 inches tall at the center. For the nose, cut another triangle a little smaller than the eyes.
Ingredients you will need![Fondant Icing]() Fondant Icing
Fondant Icing![Base]() Base
Base![Roll]() Roll
Roll
Equipment you will use![Rolling Pin]() Rolling Pin
Rolling Pin![Knife]() Knife
Knife
12
Cut the smile to be about 4 inches from tip to tip. You can draw a paper pattern first if you like.
1
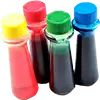
•Choose your colors: The best food colorings to use are the gel and paste varieties; the liquid type comes in fewer colors and you need much more of it than of the gel or paste to achieve the same tint intensity. If you wish to mix a custom color, mix gel with gel, paste with paste, or liquid with liquid. Gel color comes in a bottle with a squeeze top; simply squeeze out drops of color. Paste color comes in a small jar; it is more concentrated than gel and you need less of it. Use a toothpick or the tip of an offset spatula to add a "drop" of paste color to your frosting. • To tint frosting, add a few drops of color, mix thoroughly, and then add and mix in more color one drop at a time until the desired intensity is achieved. • To fill a pastry bag with frosting or glaze, first fit a coupler and tip on the bag. Then fold down about 2 inches at the open end. Grasp the bag below the folded-down section (or support it in a small glass) and fill the bag half full with the frosting. Unfold the bag and twist the top, forcing the frosting down into the tip.• You can use ready-made green candy leaves and green candy strings instead of tendrils if you don't wish to pipe the frosting. • Instead of using fondant for the features, you can roll black gumdrops between sheets of waxed paper.
Ingredients you will need![Food Color]() Food Color
Food Color![Frosting]() Frosting
Frosting![Gum Drops]() Gum Drops
Gum Drops![Fondant Icing]() Fondant Icing
Fondant Icing![Glaze]() Glaze
Glaze![Roll]() Roll
Roll
Equipment you will use![Offset Spatula]() Offset Spatula
Offset Spatula![Pastry Bag]() Pastry Bag
Pastry Bag![Toothpicks]() Toothpicks
Toothpicks
Equipment


DifficultyHard
Ready In45 m.
Servings12
Health Score0
DietsDairy Free
Dish TypesSide Dish
Related recipes
Apricot-Apple Cranberry Sauce
Spiced Apple Butter
Easy Cran-Apple Sauce
Glazed Spiced Apples
Magazine

Your Inner Chef with Taylor Swift's Top 3 Recipes from Her Beloved NYC Hangout

20 Mouthwatering Recipes You Need to Try Today!

Master the Art of Making Perfect Pancakes with This Foolproof Recipe

The Science Behind Red Wine: Its Surprising Health Benefits and Potential Risks

12 Wine Cocktails for a Sophisticated Twist

Sip, Swirl, and Celebrate: Toasting to National Wine Day on May 25th

National Drink Wine Day on February 18

Celebrating Souffle Day with Delectable Delights

Indulge in the Delightful Flavor of Oyster Soup on Its Special Day!

Celebrating World Nutella Day
12 Spring Vegetarian Recipes
15 Tasty Dessert Recipes

20 Best Breakfast Ideas to Enjoy this Spring

12 Healthy Spring Menu Ideas for 2022

Celebrate Spring with 3 Fresh Dishes
10 Healthy Springtime foods and How to Prepare Them
5 Simple Guidelines to Demystify 'Seasonal Cooking'
How to Grill Vegetables
How to Make Overnight Oats

How to Make Quiche
Your Inner Chef with Taylor Swift's Top 3 Recipes from Her Beloved NYC Hangout
12 Wine Cocktails for a Sophisticated Twist
Celebrating Souffle Day with Delectable Delights
Indulge in the Delightful Flavor of Oyster Soup on Its Special Day!

These Super Recipes for Your Football Party!

The Secrets Behind 3 Classic Comfort Food Recipes
10 Warming Recipes to Beat the Cold Days

A Collection of 15 Noodle Soup Recipes to Warm Your Soul

The Rich and Flavorful Black Food Traditions in Netflix's 'High on the Hog'