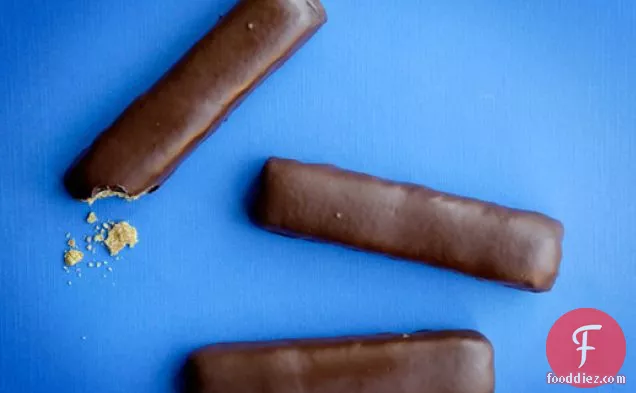
Homemade Butterfingers
You can never have too many side dish recipes, so give Homemade Butterfingers a try. This recipe covers 13% of your daily requirements of vitamins and minerals. Watching your figure? This dairy free recipe has 743 calories, 6g of protein, and 39g of fat per serving. This recipe serves 10. Head to the store and pick up water, powdered sugar, sugar, and a few other things to make it today. From preparation to the plate, this recipe takes about 1 hour and 30 minutes.
Instructions
1
Prepare the candy:Line a jelly roll pan (a 1/2 sheet pan) with a silicon mat and preheat oven to 200° F.In a medium pot, combine water, molasses, corn syrup, sugar and vanilla bean seeds. Set over medium heat and stir gently with a fork, taking care not to splash, until sugar dissolves and the mixture begins to simmer. Simmer, undisturbed, until the mixture reaches between 280 and 290°F on a candy thermometer. Due to the molasses, the mixture will have a sketchy burning smell, but remain within the recommended temperatures and rest assured that it’s not actually burning. Cooking molasses just smells funky.While the syrup is cooking, grind the peanuts and powdered sugar together in a food processor until the mixture forms a thick, damp mass with a texture like wet sand. Set aside.When the syrup comes to temperature, immediately pour the mixture onto the silicon mat in the sheet pan, taking care to keep the syrup within the center of the mat. Wearing a pair of oven mitts, tilt the pan left and right to help the syrup evenly coat the silicon mat into a roughly 14” by 10” rectangular shape. You can fold the candy back over on itself if any places flow out too far.
Ingredients you will need![Powdered Sugar]() Powdered Sugar
Powdered Sugar![Vanilla Bean]() Vanilla Bean
Vanilla Bean![Corn Syrup]() Corn Syrup
Corn Syrup![Molasses]() Molasses
Molasses![Peanuts]() Peanuts
Peanuts![Syrup]() Syrup
Syrup![Jelly]() Jelly
Jelly![Seeds]() Seeds
Seeds![Sugar]() Sugar
Sugar![Water]() Water
Water![Roll]() Roll
Roll
Equipment you will use![Candy Thermometer]() Candy Thermometer
Candy Thermometer![Food Processor]() Food Processor
Food Processor![Oven Mitt]() Oven Mitt
Oven Mitt![Oven]() Oven
Oven![Frying Pan]() Frying Pan
Frying Pan![Pot]() Pot
Pot
2
Layer the candy:If you’ve ever laminated dough, this will be a familiar process; if not, imagine this next step as folding a business letter in thirds.
Ingredients you will need![Candy]() Candy
Candy![Dough]() Dough
Dough
3
Sprinkle the ground peanut mixture in an even a layer over 2/3 of the candy. Use the silicon mat to fold the unsprinkled section up and over the center of the candy, just like the first fold of a business letter. If the candy sticks to the silicon, it’s still too hot. Wait a few moments for it to cool, then peel the silicon away; no rush. Now fold this double-thick section up and over the remaining piece. You will now have a 3 layer candy packet roughly 11” x 5”.
Ingredients you will need![Peanuts]() Peanuts
Peanuts![Candy]() Candy
Candy
4
Place the sheet pan in the preheated oven for 5 minutes, or until the candy has become warm and pliable.
Ingredients you will need![Candy]() Candy
Candy
Equipment you will use![Oven]() Oven
Oven![Frying Pan]() Frying Pan
Frying Pan
5
Remove it from the oven and lift out the silicon mat, setting it on the counter. Use a rolling pin to gently roll it out to a 14” x 10” rectangle; it will take some elbow grease. If at any time the candy begins to make a cracking sound, or feels too stiff to roll, return the pan to the oven for a minute or two. Take your time! Once you’ve rolled it out, fold it into thirds again just as you did the first time.Return the candy to the oven for another 4 minutes, then roll back out to a 14” x 10” rectangle.
Ingredients you will need![Candy]() Candy
Candy![Roll]() Roll
Roll
Equipment you will use![Rolling Pin]() Rolling Pin
Rolling Pin![Oven]() Oven
Oven![Frying Pan]() Frying Pan
Frying Pan
6
Sprinkle this rectangle with corn flakes, as you did with the peanut mixture. Fold into thirds (if, while folding the candy makes a cracking noise, stop folding and return it to the oven for about a minute, then proceed with folding). Return folded packet to the oven for another 4 minutes.
Ingredients you will need![Corn Flakes]() Corn Flakes
Corn Flakes![Peanuts]() Peanuts
Peanuts![Candy]() Candy
Candy
Equipment you will use![Oven]() Oven
Oven
7
Cut the candy into bars:Now roll the candy to 1/2” thickness and then transfer to a cutting board. Use a sharp knife to trim the edges, leaving a tidy rectangle behind. You may be able to immediately cut the candy into 10 long, thin bars. But you may find you need to return it to the oven for a minute or two. This generally depends on the temperature of the kitchen.
Ingredients you will need![Candy]() Candy
Candy![Roll]() Roll
Roll
Equipment you will use![Cutting Board]() Cutting Board
Cutting Board![Knife]() Knife
Knife![Oven]() Oven
Oven
8
Crumb coat the bars:Due to the extreme flakiness of the candy, it’s important to “crumb coat” the candy bars before dipping in chocolate. Do this by tempering 12 ounces of chocolate.
Ingredients you will need![Candy]() Candy
Candy![Chocolate]() Chocolate
Chocolate
9
Drizzle or pipe a thin line of chocolate onto the bottom of each candy piece and then flip each over to form a foot on the bottom. Next, drizzle a little chocolate over each bar and use a small pastry brush to evenly coat the bar in a thin layer of chocolate.
Ingredients you will need![Chocolate]() Chocolate
Chocolate![Candy]() Candy
Candy
Equipment you will use![Pastry Brush]() Pastry Brush
Pastry Brush
Equipment


DifficultyExpert
Ready In1 h, 30 m.
Servings10
Health Score5
DietsDairy Free
Dish TypesSide Dish
Related recipes
$2/day Diet - Spanish Rice
Tennessee Peach Pudding
Glazed Bananas in Phyllo Nut Cups
Asian Barbecued Pork Loin
Magazine

Your Inner Chef with Taylor Swift's Top 3 Recipes from Her Beloved NYC Hangout

20 Mouthwatering Recipes You Need to Try Today!

Master the Art of Making Perfect Pancakes with This Foolproof Recipe

The Science Behind Red Wine: Its Surprising Health Benefits and Potential Risks

12 Wine Cocktails for a Sophisticated Twist

Sip, Swirl, and Celebrate: Toasting to National Wine Day on May 25th

National Drink Wine Day on February 18

Celebrating Souffle Day with Delectable Delights

Indulge in the Delightful Flavor of Oyster Soup on Its Special Day!

Celebrating World Nutella Day

Exploring 20 Global Comfort Dishes to Soothe Your Sickness

10 Must-Try Airport and Train Station Restaurants

9 Must-Try Summer Menu Items Taking the Global Food Scene by Storm

Culinary Delights of New England's Top Restaurants Featured on Esquire's List of Best New Eateries in America

A Culinary Adventure: Unforgettable Delights from the Most Memorable Dishes of 2023

Top 10 Global Food Trends of 2023

Transform Your Relationship With Food With These Must-Read Books

Indiana's Exciting Addition to the Summer Food Program for School Children

Art of Chimichurri: A Mouthwatering Recipe

Tantalize Your Taste Buds: the Finest Argentinian Restaurants in Los Angeles
Your Inner Chef with Taylor Swift's Top 3 Recipes from Her Beloved NYC Hangout
12 Wine Cocktails for a Sophisticated Twist
Celebrating Souffle Day with Delectable Delights
Indulge in the Delightful Flavor of Oyster Soup on Its Special Day!

These Super Recipes for Your Football Party!

The Secrets Behind 3 Classic Comfort Food Recipes
10 Warming Recipes to Beat the Cold Days

A Collection of 15 Noodle Soup Recipes to Warm Your Soul

The Rich and Flavorful Black Food Traditions in Netflix's 'High on the Hog'