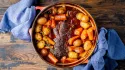
Herb Roasted Chicken

Herb Roasted Chicken is a gluten free, dairy free, and primal main course. This recipe covers 38% of your daily requirements of vitamins and minerals. One serving contains 1194 calories, 89g of protein, and 80g of fat. This recipe serves 6. 179 people found this recipe to be flavorful and satisfying. A mixture of rosemary, garlic, onions, and a handful of other ingredients are all it takes to make this recipe so flavorful. From preparation to the plate, this recipe takes around 1 hour and 45 minutes.
Instructions
2
In a small bowl combine the chopped rosemary, sage, garlic, red pepper flakes and olive oil. Season generously with salt. Using your fingertips carefully work your way under the skin of the chickens to separate the skin from the breast to develop a pocket. Schmear the herb paste under the skin of both chickens. Use all of the paste and try to distribute evenly.
Ingredients you will need![Red Pepper Flakes]() Red Pepper Flakes
Red Pepper Flakes![Olive Oil]() Olive Oil
Olive Oil![Chicken]() Chicken
Chicken![Rosemary]() Rosemary
Rosemary![Garlic]() Garlic
Garlic![Sage]() Sage
Sage![Salt]() Salt
Salt
Equipment you will use![Bowl]() Bowl
Bowl
3
Drizzle each chicken with more olive oil and massage the skin. The idea here is to lube them up like suntan lotion. This will really help to get a nice brown crispy skin.
Ingredients you will need![Olive Oil]() Olive Oil
Olive Oil![Whole Chicken]() Whole Chicken
Whole Chicken
4
Sprinkle each chicken generously with salt. Truss each chicken.
Ingredients you will need![Whole Chicken]() Whole Chicken
Whole Chicken![Salt]() Salt
Salt
5
Place the diced veggies, bay leaves and thyme bundle in a roasting pan large enough to accommodate the 2 chickens without touching. Usually a 9 by 13-inch roasting pan will be perfect.
Ingredients you will need![Bay Leaves]() Bay Leaves
Bay Leaves![Chicken]() Chicken
Chicken![Thyme]() Thyme
Thyme
Equipment you will use![Roasting Pan]() Roasting Pan
Roasting Pan
6
Add 2 cups of chicken stock and season generously with salt. Arrange the chickens on top of the veggies in the roasting pan and place in the preheated oven.
Ingredients you will need![Chicken Stock]() Chicken Stock
Chicken Stock![Chicken]() Chicken
Chicken![Salt]() Salt
Salt
Equipment you will use![Roasting Pan]() Roasting Pan
Roasting Pan![Oven]() Oven
Oven
7
Check the chickens about 15 minutes into the cooking process, the skin should be starting to turn a lovely brown. Lower the heat to 375 degrees F and continue roasting. After another 15 minutes, remove the chickens from the oven and turn over. At this point check the level of liquid in the roasting pan. If most of the liquid has evaporated, add another cup of stock and return the chickens to the oven. When the chickens have browned on the bottom, about 15 minutes, remove them from the oven and turn them back over. Return the chickens to the oven for the final 15 minutes of cooking. During this time the skin on the chickens should be very brown and crispy.
Ingredients you will need![Chicken]() Chicken
Chicken![Stock]() Stock
Stock
Equipment you will use![Roasting Pan]() Roasting Pan
Roasting Pan![Oven]() Oven
Oven
8
Remove the chickens from the oven and take the temperature in the crease between the thigh and the breast. (When doing this be sure not to have the thermometer probe touch a bone or you will get an inaccurate reading.) The thermometer should read between 160 and 170 degrees F. When cooking poultry in general the rule is 17 minutes per pound. If the thermometer reads less than 160 degrees F return the chicken to the oven for an additional 10 minutes and then re-check the temperature.
Ingredients you will need![Poultry]() Poultry
Poultry![Bone]() Bone
Bone
Equipment you will use![Kitchen Thermometer]() Kitchen Thermometer
Kitchen Thermometer![Oven]() Oven
Oven
9
When chickens have reached the proper temp remove them from the roasting pan, place them on a warm platter and cover loosely with foil.
Ingredients you will need![Chicken]() Chicken
Chicken
Equipment you will use![Roasting Pan]() Roasting Pan
Roasting Pan![Aluminum Foil]() Aluminum Foil
Aluminum Foil
11
After the chickens have been removed from the roasting pan, skim off the excess fat from the surface of the liquid. The easiest way to do this is to prop up 1 end of the pan and allow the fat to run to the other end of the pan. You may not be able to get all of the fat, which is ok-fat tastes good!
Ingredients you will need![Chicken]() Chicken
Chicken
Equipment you will use![Roasting Pan]() Roasting Pan
Roasting Pan
12
Put the roasting pan on a burner, add the wine, bring to a medium heat and reduce by half.
Ingredients you will need![Wine]() Wine
Wine
Equipment you will use![Roasting Pan]() Roasting Pan
Roasting Pan
14
Add salt if needed- you probably will need salt. At this point you can decide if you are a "strainer" or not a strainer, meaning if you would like to strain the chunky vegetables out of the sauce or not. I myself, am not a strainer. When the sauce has reached the desired consistency and flavor remove from the heat and pour into desired serving vessel.
Ingredients you will need![Vegetable]() Vegetable
Vegetable![Sauce]() Sauce
Sauce![Salt]() Salt
Salt
Equipment you will use![Sieve]() Sieve
Sieve
1
Cut off the twine. Pull the thigh and leg away from the breast of the chicken until the thigh bone "pops" out of the socket. This is also a sign that the chicken is cooked properly. Separate the thigh and drumstick.
Ingredients you will need![Chicken Drumsticks]() Chicken Drumsticks
Chicken Drumsticks![Whole Chicken]() Whole Chicken
Whole Chicken![Bone]() Bone
Bone
Equipment you will use![Kitchen Twine]() Kitchen Twine
Kitchen Twine


Ingredients
2![bay leaves]() bay leaves2smalls
bay leaves2smalls![large or carrots, peeled and cut into 1/2-inch dice]() large or carrots, peeled and cut into 1/2-inch dice3ribs
large or carrots, peeled and cut into 1/2-inch dice3ribs![celery, cut into 1/2-inch dice]() celery, cut into 1/2-inch dice946milliliters
celery, cut into 1/2-inch dice946milliliters![rich chicken stock]() rich chicken stock3kilograms
rich chicken stock3kilograms![whole chickens]() whole chickens355milliliters
whole chickens355milliliters![dry white wine]() dry white wine3cloves
dry white wine3cloves![garlic, smashed and finely chopped]() garlic, smashed and finely chopped6servings
garlic, smashed and finely chopped6servings![Kosher salt]() Kosher salt4Tbsps
Kosher salt4Tbsps![extra-virgin olive oil, plus more for drizzling]() extra-virgin olive oil, plus more for drizzling2smalls
extra-virgin olive oil, plus more for drizzling2smalls![large or onions, cut into 1/2-inch dice]() large or onions, cut into 1/2-inch dice1pinch
large or onions, cut into 1/2-inch dice1pinch![Pinch red pepper flakes]() Pinch red pepper flakes5sprigs
Pinch red pepper flakes5sprigs![rosemary, picked and finely chopped, about 2 tablespoons]() rosemary, picked and finely chopped, about 2 tablespoons10
rosemary, picked and finely chopped, about 2 tablespoons10![sage leaves, picked and finely chopped, about 2 tablespoons]() sage leaves, picked and finely chopped, about 2 tablespoons1
sage leaves, picked and finely chopped, about 2 tablespoons1![bundle thyme, about 10 sprigs tied together with string]() bundle thyme, about 10 sprigs tied together with string
bundle thyme, about 10 sprigs tied together with string
 bay leaves2smalls
 large or carrots, peeled and cut into 1/2-inch dice3ribs
 celery, cut into 1/2-inch dice946milliliters
 rich chicken stock3kilograms
 whole chickens355milliliters
 dry white wine3cloves
 garlic, smashed and finely chopped6servings
 Kosher salt4Tbsps
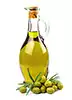 extra-virgin olive oil, plus more for drizzling2smalls
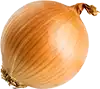 large or onions, cut into 1/2-inch dice1pinch
 Pinch red pepper flakes5sprigs
 rosemary, picked and finely chopped, about 2 tablespoons10
 sage leaves, picked and finely chopped, about 2 tablespoons1
 bundle thyme, about 10 sprigs tied together with string
DifficultyExpert
Ready In1 h, 45 m.
Servings6
Health Score29
Related recipes
Angel Food Cake with Tropical Fruit Compote
Broccoli Bacon Salad
Orange-Glazed Bacon
Glazed Bacon
Magazine

Your Inner Chef with Taylor Swift's Top 3 Recipes from Her Beloved NYC Hangout

20 Mouthwatering Recipes You Need to Try Today!

Master the Art of Making Perfect Pancakes with This Foolproof Recipe

The Science Behind Red Wine: Its Surprising Health Benefits and Potential Risks

12 Wine Cocktails for a Sophisticated Twist

Sip, Swirl, and Celebrate: Toasting to National Wine Day on May 25th

National Drink Wine Day on February 18

Celebrating Souffle Day with Delectable Delights

Indulge in the Delightful Flavor of Oyster Soup on Its Special Day!

Celebrating World Nutella Day
Going Green Delicious and Nutritious Green Foods for a Healthier You
Discover the Nutritional Superpowers of a Brown Food Diet
10 Foods that Relieve Constipation Naturally

Celebrations of Dominican Republic Independence Day delightful recipes

Vibrant World of South Asian Food Trucks at the Mississauga Festival

Celebrating Costa Rica Independence Day with an Authentic Culinary Experience

Grab the Best Deals on Food Gifts: Black Friday and Cyber Monday Specials

The Black Food Festival: A Culinary Adventure Like No Other

The Rich and Flavorful Black Food Traditions in Netflix's 'High on the Hog'
10 Slow Cooker Recipes to Keep You Warm and Cozy in January
Your Inner Chef with Taylor Swift's Top 3 Recipes from Her Beloved NYC Hangout
20 Mouthwatering Recipes You Need to Try Today!
Sip, Swirl, and Celebrate: Toasting to National Wine Day on May 25th
National Drink Wine Day on February 18
Indulge in the Delightful Flavor of Oyster Soup on Its Special Day!

These Super Recipes for Your Football Party!
The Secrets Behind 3 Classic Comfort Food Recipes

Celebrate National Pizza Day on February 9th with Mouthwatering Slices and Fun Facts

Recipes to Spice Up Your February Menu