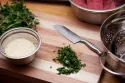
Croissants

You can never have too many side dish recipes, so give Croissants a try. This recipe serves 10. Watching your figure? This vegetarian recipe has 202 calories, 7g of protein, and 4g of fat per serving. This recipe covers 7% of your daily requirements of vitamins and minerals. Head to the store and pick up sugar, unbleached flour, egg, and a few other things to make it today. From preparation to the plate, this recipe takes approximately 14 hours.
Instructions
1
Using a stand mixer fitted with the dough hook (or a hand mixer), mix together the milk and yeast on low speed for 5 to 10 seconds to dissolve the yeast.
Ingredients you will need![Dough]() Dough
Dough![Yeast]() Yeast
Yeast![Milk]() Milk
Milk
Equipment you will use![Stand Mixer]() Stand Mixer
Stand Mixer![Hand Mixer]() Hand Mixer
Hand Mixer
2
Add the all-purpose flour, bread flour, salt, sugar, and the 2 tablespoons soft butter and continue to mix on low speed for 3 to 4 minutes, or until the butter is fully incorporated and the dough is smooth.
Ingredients you will need![Bread Flour]() Bread Flour
Bread Flour![Butter]() Butter
Butter![Dough]() Dough
Dough![Sugar]() Sugar
Sugar![Salt]() Salt
Salt
3
Remove the dough from the mixer bowl, place it on a tray, and cover it loosely with plastic wrap. This dough block is called the détrempe.
Ingredients you will need![Dough]() Dough
Dough![Wrap]() Wrap
Wrap
Equipment you will use![Plastic Wrap]() Plastic Wrap
Plastic Wrap![Blender]() Blender
Blender![Bowl]() Bowl
Bowl
4
Place the tray in the refrigerator for at least 6 hours or for up to 12 hours. The dough will firm up and the yeast will take some action and proof a bit.
Ingredients you will need![Dough]() Dough
Dough![Yeast]() Yeast
Yeast
5
At least 6 hours later, put the détrempe on a well-floured work surface, and then press down firmly to create about an 8-inch square. Rotate the square so that, as you face it, it looks like a baseball diamond. Use the sides of your palm to mark a 7-inch square in the middle of the diamond, creating triangular flaps at the 4 corners.
6
As best you can, roll out each of the triangular flaps into a squarish shape (about 3-inch squares). You will have to tug a bit at the edges to pull the flap into a square as you roll. When you are done, the entire piece of dough will be about 12 inches wide and tall, with a 6-inch-square lump in the middle and one squarish flap off of each side of that lump. The 6-inch-square lump will be about 1 inch thick, and the 4 squarish flaps will be about 1/4 inch thick.
Ingredients you will need![Dough]() Dough
Dough![Roll]() Roll
Roll
7
Place the 1 cup cold butter in the stand mixer fitted with the paddle attachment, and beat on medium speed for 15 to 20 seconds to break up the butter, yet still keep it quite cold. (Alternatively, pound the cold butter with a rolling pin to soften it and shape it into a 6-inch square.) Scrape the butter out of the bowl directly onto the 6-inch-square lump in the center of the dough, and pat it with your fingers into a square that covers the 6-inch-square lump. The butter should be about the same consistency as the dough.
Ingredients you will need![Butter]() Butter
Butter![Dough]() Dough
Dough
Equipment you will use![Rolling Pin]() Rolling Pin
Rolling Pin![Stand Mixer]() Stand Mixer
Stand Mixer![Bowl]() Bowl
Bowl
8
Fold one of the flaps up and stretch it over the butter square to cover it entirely. (The dough is quite stretchy, so you can stretch it to cover the butter completely.) Fold and stretch a second flap over the first flap, then repeat with the third and then the fourth flap. Tug at the flaps to keep them in a square that covers the butter. You will now have a butter square that is entirely encased in dough above and below. Using the palms of both hands, firmly press down on this dough package to create about an 8-inch square.
Ingredients you will need![Butter]() Butter
Butter![Dough]() Dough
Dough
9
When the dough package is relatively flat, switch to a rolling pin and continue to flatten the dough by pressing up and down on the package with the pin.
Ingredients you will need![Dough]() Dough
Dough
Equipment you will use![Rolling Pin]() Rolling Pin
Rolling Pin
10
Roll out the dough into a rectangle about 16 by 10 inches. As you work, flour the dough and the work surface as needed to prevent the rolling pin from sticking to the dough.
Ingredients you will need![Dough]() Dough
Dough![All Purpose Flour]() All Purpose Flour
All Purpose Flour![Roll]() Roll
Roll
Equipment you will use![Rolling Pin]() Rolling Pin
Rolling Pin
11
Position the rectangle so a long side is facing you. Using a bench scraper or a knife, score the rectangle in half vertically, to create two 10-by-8-inch rectangles.
Equipment you will use![Dough Scraper]() Dough Scraper
Dough Scraper![Knife]() Knife
Knife
12
Brush any loose flour off the dough. Lift the right side of the dough and fold it in, so the right edge meets the scored line in the center. Then lift the left side of the dough and fold it in, so the left edge also meets the scored line in the center and meets the right edge, as well. Square off the folds as much as possible so the edges meet neatly, then fold the right half of the dough on top of the left half. This is called a book fold. Your dough will now be 4 inches wide, 10 inches from top to bottom, and about 2 inches thick. Rotate the dough pile clockwise 90 degrees; it will now be 10 inches wide and 4 inches from top to bottom. The process of folding and rotating is called “turning the dough.”
Ingredients you will need![Dough]() Dough
Dough![All Purpose Flour]() All Purpose Flour
All Purpose Flour
13
Now, roll out the dough into a rectangle about 18 inches wide and 8 inches from top to bottom. The dough might be a little sticky, so, again, be sure to flour the dough and the work surface as needed to prevent the pin from sticking. Using the bench scraper or knife, this time lightly score the rectangle vertically into thirds. Each third will be 6 inches wide and 8 inches from top to bottom.
Ingredients you will need![Dough]() Dough
Dough![All Purpose Flour]() All Purpose Flour
All Purpose Flour![Roll]() Roll
Roll
Equipment you will use![Dough Scraper]() Dough Scraper
Dough Scraper![Knife]() Knife
Knife
14
Brush any loose flour off the dough. Take the right third of the dough and flip it over onto the middle third. Then take the left third of the dough and flip that third on top of the middle and right thirds. (This is like folding a business letter.) Your dough should now be about 6 inches wide, 8 inches from top to bottom, and about 2 inches thick. Rotate the dough pile clockwise 90 degrees; it will now be 8 inches wide and 6 inches from top to bottom.
Ingredients you will need![Dough]() Dough
Dough![All Purpose Flour]() All Purpose Flour
All Purpose Flour
15
Place the dough on a baking sheet and cover it completely with plastic wrap, tucking the plastic under the dough as if you are tucking it into bed. Refrigerate for at least 1 1/2 hours and no more than 3 hours.
Ingredients you will need![Dough]() Dough
Dough![Wrap]() Wrap
Wrap
Equipment you will use![Baking Sheet]() Baking Sheet
Baking Sheet![Plastic Wrap]() Plastic Wrap
Plastic Wrap
16
Remove the dough from the refrigerator and place it on a well-floured work surface, with a long side of the rectangle facing you. This time roll out the dough into a rectangle about 18 inches wide and 12 inches from top to bottom. If the dough resists rolling, let it sit and relax for up to 15 minutes and roll again. Once again score it vertically into thirds, and then give it another letter fold (fold the right third onto the middle third, and fold the left third on top of that). Return the dough to the baking sheet and again cover it completely with plastic wrap. This time let it rest in the refrigerator for at least 4 hours or up to 16 hours.
Ingredients you will need![Dough]() Dough
Dough![Roll]() Roll
Roll![Wrap]() Wrap
Wrap
Equipment you will use![Baking Sheet]() Baking Sheet
Baking Sheet![Plastic Wrap]() Plastic Wrap
Plastic Wrap
18
Remove the dough from the refrigerator, and place it once again on a well-floured work surface, with a long side of the rectangle facing you.
Ingredients you will need![Dough]() Dough
Dough
19
Roll it out into a long, narrow rectangle about 30 inches wide and 6 to 7 inches from top to bottom.
Ingredients you will need![Roll]() Roll
Roll
20
Starting at the bottom left corner of the rectangle, make a mark along the bottom edge of the rectangle every 5 inches until you reach the bottom right corner. Then, starting at the top left corner of the rectangle, mark along the top edge exactly midway between the notches on the bottom edge. Your first notch will be 2 1/2 inches from the left corner and then continue to notch every 5 inches. Use a chef’s knife to cut the dough rectangle into triangles by cutting on the diagonal from notch to notch. You will end up with 10 triangles and a few edge pieces of scrap.
Ingredients you will need![Dough]() Dough
Dough
Equipment you will use![Knife]() Knife
Knife
21
Starting at the edge, cut a 1-inch vertical slit at the center of the base of each triangle. Turn all of the triangles so the base is at the top, farthest from you, and the point is directed toward you. Pick up a triangle and hold it by its base with one hand and gently stretch it and stroke it lengthwise with your other hand to elongate it to 10 to 12 inches in length.
Ingredients you will need![Base]() Base
Base
22
Place the lengthened triangle on the work surface. Fan open the base at the 1-inch slit into a Y, and then roll the dough down to the point.
Ingredients you will need![Dough]() Dough
Dough![Base]() Base
Base![Roll]() Roll
Roll
23
Place the rolled triangle, point-side down, on the parchment-lined baking sheet, so the point is touching the parchment. Repeat with the remaining dough triangles, spacing the pastries 2 to 3 inches apart on the baking sheet.
Ingredients you will need![Dough]() Dough
Dough
Equipment you will use![Baking Sheet]() Baking Sheet
Baking Sheet
24
Cover the croissants lightly with plastic wrap and leave them in a warm place for 2 to 2 1/2 hours, or until they are somewhat poufy and airy.
Ingredients you will need![Croissant]() Croissant
Croissant![Wrap]() Wrap
Wrap
Equipment you will use![Plastic Wrap]() Plastic Wrap
Plastic Wrap
25
In a small bowl, whisk the egg until blended. Gently brush the croissants lightly with the egg.
Ingredients you will need![Croissant]() Croissant
Croissant![Egg]() Egg
Egg
Equipment you will use![Whisk]() Whisk
Whisk![Bowl]() Bowl
Bowl
26
If you are baking the croissants the same day, cover them again with plastic wrap and let them finish proofing for another 1 hour to 1 hour and 30 minutes. They will get even more poufy and jiggly when you nudge them.
Ingredients you will need![Croissant]() Croissant
Croissant![Wrap]() Wrap
Wrap
Equipment you will use![Plastic Wrap]() Plastic Wrap
Plastic Wrap
28
When the croissants are done proofing, brush them again with the beaten egg.
Ingredients you will need![Croissant]() Croissant
Croissant![Egg]() Egg
Egg
29
Bake at 400°F for the first 5 minutes, then turn down the oven to 350°F and bake for another 25 to 35 minutes (for a total baking time of 30 to 40 minutes), or until they are golden brown all over.
Equipment you will use![Oven]() Oven
Oven
32
If you are baking the croissants the next day, after the first 2- to 2 ½-hour proof, brush them lightly with the beaten egg as directed, wrap them in plastic wrap and place in the refrigerator. The next morning, remove them from the refrigerator and let them sit at room temperature for 30 to 40 minutes. Then heat the oven, brush them again with the beaten egg, and bake as directed.
Ingredients you will need![Croissant]() Croissant
Croissant![Wrap]() Wrap
Wrap![Egg]() Egg
Egg
Equipment you will use![Plastic Wrap]() Plastic Wrap
Plastic Wrap![Oven]() Oven
Oven
Equipment


Ingredients
3teaspoons![package active dry yeast or 2/3 ounce fresh cake yeast]() package active dry yeast or 2/3 ounce fresh cake yeast158milliliters
package active dry yeast or 2/3 ounce fresh cake yeast158milliliters![bread flour]() bread flour1
bread flour1![egg]() egg2teaspoons
egg2teaspoons![kosher salt]() kosher salt237milliliters
kosher salt237milliliters![milk, at room temperature]() milk, at room temperature59milliliters
milk, at room temperature59milliliters![sugar]() sugar532milliliters
sugar532milliliters![unbleached all-purpose flour]() unbleached all-purpose flour2Tbsps
unbleached all-purpose flour2Tbsps![(1/4 stick) unsalted butter, very soft, plus 1 cup (2 sticks) cold unsalted butter]() (1/4 stick) unsalted butter, very soft, plus 1 cup (2 sticks) cold unsalted butter
(1/4 stick) unsalted butter, very soft, plus 1 cup (2 sticks) cold unsalted butter
 package active dry yeast or 2/3 ounce fresh cake yeast158milliliters
 bread flour1
 egg2teaspoons
 kosher salt237milliliters
 milk, at room temperature59milliliters
 sugar532millilitersunbleached all-purpose flour2Tbsps
 (1/4 stick) unsalted butter, very soft, plus 1 cup (2 sticks) cold unsalted butter
DifficultyExpert
Ready In14 hrs
Servings10
Health Score3
DietsLacto Ovo Vegetarian
Dish TypesSide Dish
Related recipes
$2/day Diet - Spanish Rice
Tennessee Peach Pudding
Pumpkin Spice Cupcakes with Bourbon Brown Sugar Cream Cheese Frosting
Low-Fat Gravy
Magazine

Your Inner Chef with Taylor Swift's Top 3 Recipes from Her Beloved NYC Hangout

20 Mouthwatering Recipes You Need to Try Today!

Master the Art of Making Perfect Pancakes with This Foolproof Recipe

The Science Behind Red Wine: Its Surprising Health Benefits and Potential Risks

12 Wine Cocktails for a Sophisticated Twist

Sip, Swirl, and Celebrate: Toasting to National Wine Day on May 25th

National Drink Wine Day on February 18

Celebrating Souffle Day with Delectable Delights

Indulge in the Delightful Flavor of Oyster Soup on Its Special Day!

Celebrating World Nutella Day

Traditional Latin American Foods
How to Caramelize Onions
How to Clean A Pumpkin For A Pie

How to Cook Brussel Sprouts on a Stove?

How to Clean Out a Pumpkin Like a Pro
How to Peel a Pumpkin for Cooking

5 Easy Dinner Recipes for Beginners

10 Best Yellow Food Ideas

10 Easy Desserts for Effortless Entertaining

11 Salmon Recipes to Melt in Your Mouth
Your Inner Chef with Taylor Swift's Top 3 Recipes from Her Beloved NYC Hangout
20 Mouthwatering Recipes You Need to Try Today!
12 Wine Cocktails for a Sophisticated Twist
Celebrating Souffle Day with Delectable Delights
Indulge in the Delightful Flavor of Oyster Soup on Its Special Day!

These Super Recipes for Your Football Party!

The Secrets Behind 3 Classic Comfort Food Recipes

Celebrate National Pizza Day on February 9th with Mouthwatering Slices and Fun Facts

Vegetarian soup recipes are not just for vegetarians anymore