Baking with Dorie: An Easy Fruit Tart

You can never have too many side dish recipes, so give Baking with Dorie: An Easy Fruit Tart From preparation to the plate, this recipe takes around 45 minutes. It is a good option if you're following a vegetarian diet.
Instructions
1
Stir the jam to loosen it to a spreadable consistency or, if it's very stiff, warm it in a microwave oven for a few seconds.
Ingredients you will need![Jam]() Jam
Jam
Equipment you will use![Microwave]() Microwave
Microwave![Oven]() Oven
Oven
2
Cut as many portions of the crust as you need, put each portion on a plate and spread the jam over the cut pieces.
Ingredients you will need![Crust]() Crust
Crust![Jam]() Jam
Jam
3
Hull and half as many berries as you need (if they're really large, you might want to quarter them or slice them) and, if you think they need it, toss them with some sugar.
Ingredients you will need![Berries]() Berries
Berries![Sugar]() Sugar
Sugar
4
Add a splash of liqueur, if you'd like, and stir in the black pepper, basil, mint or zest, if you feel like it. (Use a light touch with the extras – the berries are the main event and anything else should be there only to enhance their flavor.)
Ingredients you will need![Black Pepper]() Black Pepper
Black Pepper![Berries]() Berries
Berries![Liqueur]() Liqueur
Liqueur![Basil]() Basil
Basil![Mint]() Mint
Mint
5
Spoon the berries and any juices that have accumulated over the slices of crust. Don't try to be neat – the berries should tumble over the sides of the crust.
Ingredients you will need![Berries]() Berries
Berries![Crust]() Crust
Crust
7
Storing: While you can bake the crust early in the day (or, in a pinch, the day before) and keep it at room temperature, and you can also cut and sugar the berries about an hour in advance, the tart should be assembled just before serving.
Ingredients you will need![Berries]() Berries
Berries![Crust]() Crust
Crust![Sugar]() Sugar
Sugar
Equipment you will use![Oven]() Oven
Oven
9
Put the flour, sugar and salt in the bowl of a food processor and pulse a few times to combine. Scatter the pieces of butter over the dry ingredients and pulse until the butter is coarsely cut in—you should have pieces the size of oatmeal flakes and some the size of peas. Stir the yolk, just to break it up, and add it a little at a time, pulsing after each addition. When the egg is in, process in long pulses—about 10 seconds each—until the dough, which will look granular soon after the egg is added, forms clumps and curds. Just before you reach this stage, the sound of the machine working the dough will change—heads up. Turn the dough out onto a work surface and, very lightly and sparingly, knead the dough just to incorporate any dry ingredients that might have escaped mixing.
Ingredients you will need![Oatmeal]() Oatmeal
Oatmeal![Butter]() Butter
Butter![Dough]() Dough
Dough![All Purpose Flour]() All Purpose Flour
All Purpose Flour![Sugar]() Sugar
Sugar![Peas]() Peas
Peas![Salt]() Salt
Salt![Egg Yolk]() Egg Yolk
Egg Yolk![Egg]() Egg
Egg
Equipment you will use![Food Processor]() Food Processor
Food Processor![Bowl]() Bowl
Bowl
10
To roll or press the dough into the pan: Butter a 9-inch fluted tart pan with a removable bottom.
Ingredients you will need![Butter]() Butter
Butter![Dough]() Dough
Dough![Roll]() Roll
Roll
Equipment you will use![Tart Form]() Tart Form
Tart Form![Frying Pan]() Frying Pan
Frying Pan
11
If you want to roll the dough, chill it for about 2 hours before rolling (unless you've used frozen butter and the dough comes out of the processor firm and cold, in which case you can roll it immediately). I find it easiest to roll this dough out between two sheets of plastic film – make sure to peel away the film frequently, so it doesn't get rolled into the dough. If you want to use the press-in method, you can work with the dough as soon as it's processed. Just press the dough evenly over the bottom and up the sides of the pan. Don't be too heavy-handed – press the crust in so that the edges of the pieces cling to one another, but don't press so hard that the crust loses its crumbly texture.
Ingredients you will need![Butter]() Butter
Butter![Crust]() Crust
Crust![Dough]() Dough
Dough![Roll]() Roll
Roll
Equipment you will use![Frying Pan]() Frying Pan
Frying Pan
12
Freeze the crust for at least 30 minutes, preferably longer, before baking.
Ingredients you will need![Crust]() Crust
Crust
13
To fully bake the crust: Center a rack in the oven and preheat the oven to 375°F.
Ingredients you will need![Crust]() Crust
Crust
Equipment you will use![Oven]() Oven
Oven
14
Butter the shiny side of a piece of aluminum foil (or use nonstick foil) and fit the foil, buttered side down, tightly against the crust. (Since you froze the crust, you can bake it without weights.)
Ingredients you will need![Butter]() Butter
Butter![Crust]() Crust
Crust
Equipment you will use![Aluminum Foil]() Aluminum Foil
Aluminum Foil![Oven]() Oven
Oven
15
Put the tart pan on a baking sheet and bake the crust for 25 minutes. Carefully remove the foil. If the crust has puffed, press it down gently with the back of a spoon (or prick it with the tip of a small knife).
Ingredients you will need![Crust]() Crust
Crust
Equipment you will use![Baking Sheet]() Baking Sheet
Baking Sheet![Oven]() Oven
Oven![Tart Form]() Tart Form
Tart Form![Knife]() Knife
Knife![Aluminum Foil]() Aluminum Foil
Aluminum Foil
16
Bake the crust for another 8 minutes or so, or until it is firm and golden brown, brown being the important word: a pale crust doesn't have a lot of flavor.
Ingredients you will need![Crust]() Crust
Crust
Equipment you will use![Oven]() Oven
Oven
17
Transfer the pan to a rack and cool the crust to room temperature.
Ingredients you will need![Crust]() Crust
Crust
Equipment you will use![Frying Pan]() Frying Pan
Frying Pan
18
Storing: The dough can be wrapped and kept in the refrigerator for up to 5 days or frozen for up to 2 months. While the fully baked crust can be packed airtight and frozen for up to 2 months, I prefer to freeze the unbaked crust in the pan and bake it directly from the freezer – it has a fresher flavor. Just add about 5 minutes to the baking time.
Ingredients you will need![Crust]() Crust
Crust![Dough]() Dough
Dough
Equipment you will use![Oven]() Oven
Oven![Frying Pan]() Frying Pan
Frying Pan


Ingredients
1stick![plus 1 tablespoon (9 tablespoons; 4 1/2 ounces) very cold (or frozen) unsalted butter, cut into small pieces]() plus 1 tablespoon (9 tablespoons; 4 1/2 ounces) very cold (or frozen) unsalted butter, cut into small pieces1large
plus 1 tablespoon (9 tablespoons; 4 1/2 ounces) very cold (or frozen) unsalted butter, cut into small pieces1large![egg yolk]() egg yolk355milliliters
egg yolk355milliliters![all-purpose flour]() all-purpose flour6servings
all-purpose flour6servings![Crème fraîche or lightly whipped cream]() Crème fraîche or lightly whipped cream1
Crème fraîche or lightly whipped cream1![9-inch tart shell (see recipe below), fully baked, cooled and removed from pan]() 9-inch tart shell (see recipe below), fully baked, cooled and removed from pan0teaspoons
9-inch tart shell (see recipe below), fully baked, cooled and removed from pan0teaspoons![salt]() salt946milliliters
salt946milliliters![About ripe strawberries]() About ripe strawberries6servings
About ripe strawberries6servings![Best-quality strawberry jam]() Best-quality strawberry jam118milliliters
Best-quality strawberry jam118milliliters![confectioner's sugar]() confectioner's sugar
confectioner's sugar
 plus 1 tablespoon (9 tablespoons; 4 1/2 ounces) very cold (or frozen) unsalted butter, cut into small pieces1large
 egg yolk355milliliters
 all-purpose flour6servings
 Crème fraîche or lightly whipped cream1
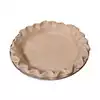 9-inch tart shell (see recipe below), fully baked, cooled and removed from pan0teaspoons
 salt946milliliters
 About ripe strawberries6servings
 Best-quality strawberry jam118milliliters
 confectioner's sugar
DifficultyExpert
Ready In45 m.
Servings6
Health Score7
DietsLacto Ovo Vegetarian
Dish TypesSide Dish
Related recipes
Apricot-Apple Cranberry Sauce
Spiced Apple Butter
Grilled Beef Burgers
Frozen Meringue Cake
Magazine

Your Inner Chef with Taylor Swift's Top 3 Recipes from Her Beloved NYC Hangout

20 Mouthwatering Recipes You Need to Try Today!

Master the Art of Making Perfect Pancakes with This Foolproof Recipe

The Science Behind Red Wine: Its Surprising Health Benefits and Potential Risks

12 Wine Cocktails for a Sophisticated Twist

Sip, Swirl, and Celebrate: Toasting to National Wine Day on May 25th

National Drink Wine Day on February 18

Celebrating Souffle Day with Delectable Delights

Indulge in the Delightful Flavor of Oyster Soup on Its Special Day!

Celebrating World Nutella Day

21 Date Night Recipes to Make Together

22 Best Bread Recipes

24 Comforting Soul Food Recipes

25 Easy Midweek Meals

November Foods in Season and What to Cook With Them

Traditional Chinese Foods

Traditional Eastern European Foods
Traditional European foods

Traditional Indian foods

How Do You Cut and Cook Parsnips?
Your Inner Chef with Taylor Swift's Top 3 Recipes from Her Beloved NYC Hangout
20 Mouthwatering Recipes You Need to Try Today!
12 Wine Cocktails for a Sophisticated Twist
Celebrating Souffle Day with Delectable Delights
Indulge in the Delightful Flavor of Oyster Soup on Its Special Day!

These Super Recipes for Your Football Party!
The Secrets Behind 3 Classic Comfort Food Recipes

Celebrate National Pizza Day on February 9th with Mouthwatering Slices and Fun Facts

Vegetarian soup recipes are not just for vegetarians anymore