Bran-Fermented Vegetables from 'Mastering Fermentation
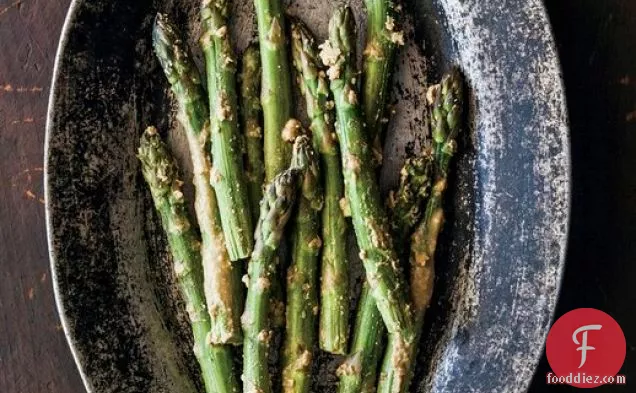
You can never have too many main course recipes, so give Bran-Fermented Vegetables from 'Mastering Fermentation a try. This recipe serves 8. Watching your figure? This dairy free and vegetarian recipe has 306 calories, 21g of protein, and 6g of fat per serving. A mixture of handcrafted beer, miso, nonchlorinated water, and a handful of other ingredients are all it takes to make this recipe so delicious. To use up the fresh ginger you could follow this main course with the Fresh Ginger Cookies as a dessert. From preparation to the plate, this recipe takes roughly 120 hours.
Instructions
1
Dry-toast the bran in a large skillet over medium heat for about 5 minutes, or spread on a baking sheet and roast in a 300°F oven just until you can smell it, about 7 minutes.
Ingredients you will need![Spread]() Spread
Spread![Toast]() Toast
Toast![Bran]() Bran
Bran
Equipment you will use![Baking Sheet]() Baking Sheet
Baking Sheet![Frying Pan]() Frying Pan
Frying Pan![Oven]() Oven
Oven
3
Place in a large bowl and toss in the dried kelp, if using. In a separate bowl, combine the water and beer and stir in the salt to combine and dissolve. Stir this into the bran to incorporate; it should look like wet sand.
Ingredients you will need![Water]() Water
Water![Beer]() Beer
Beer![Bran]() Bran
Bran![Kelp]() Kelp
Kelp![Salt]() Salt
Salt
Equipment you will use![Bowl]() Bowl
Bowl
5
Massage the mixture with clean hands until it is a smooth paste sort of like wet sand. For the initial batch, you’ll need to get the bacteria happening a few days in advance of burying the vegetables meant for pickles. In the crock, layer an inch or two of “sand” and then layer in the vegetable scraps. Top with the rest of the “sand,” set the crock on the kitchen counter, cover it with fine-weave cheesecloth, and let the fermentation party begin.
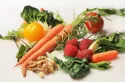
Ingredients you will need![Vegetable]() Vegetable
Vegetable![Pickles]() Pickles
Pickles
Equipment you will use![Cheesecloth]() Cheesecloth
Cheesecloth
6
Let stand for 3 days, and then remove the pieces of vegetable scraps. The wet sand is then ready to be used for making nuka pickles.
Ingredients you will need![Vegetable]() Vegetable
Vegetable![Pickles]() Pickles
Pickles
7
Wash and trim the vegetables. Peel if the skin is not to be eaten. Small whole vegetables of about equal size are best. They will ferment at about the same pace, and they are easy to bury and then find in the sand. They can be sliced into smaller pieces post-pickling.
Ingredients you will need![Vegetable]() Vegetable
Vegetable
8
Dump out the wet sand mixture from the crock onto a baking sheet.
Equipment you will use![Baking Sheet]() Baking Sheet
Baking Sheet
9
Mix in a bit more water if the mixture has be-come crumbly. Taste and smell it. To me, it smells like healthy bread dough or even miso. If at any time the mixture smells sour or funky, discard it and start a fresh batch.
Ingredients you will need![Bread Dough]() Bread Dough
Bread Dough![Water]() Water
Water![Miso]() Miso
Miso
10
Fill the bottom of your crock with about 2 inches of the “sand.” Partially bury one variety of vegetable into the mixture, leaving space between the pieces to fill with sand. Fill with sand in between, and then place another layer of sand on top (this time about 1 inch deep), and proceed with the next vegetable. Repeat the process, finishing with a layer of sand to completely enclose the vegetables. Cover the crock with fine-weave cheesecloth and secure with a rubber band. Set it on your kitchen counter or in a cool place to ferment.
Ingredients you will need![Vegetable]() Vegetable
Vegetable
Equipment you will use![Cheesecloth]() Cheesecloth
Cheesecloth
11
Taste-test one piece after 12 hours. If still “raw,” continue fermenting; most vegetables take 1 to 2 days. If you like it (it should still be a bit crunchy), gently dump the mixture onto a baking sheet and dig for your treasures.
Ingredients you will need![Vegetable]() Vegetable
Vegetable
Equipment you will use![Baking Sheet]() Baking Sheet
Baking Sheet
12
Brush off any bits of bran from the pickles or gently slosh them in a bowl of cool water to remove excess. The pickles are ready to consume. It is best to eat them within a day or two after pickling.
Ingredients you will need![Pickles]() Pickles
Pickles![Water]() Water
Water![Bran]() Bran
Bran
Equipment you will use![Bowl]() Bowl
Bowl
14
Gather up the wet sand and store in the same crock. You do not need to wash the crock, as the bacteria within will be good for the next batch. Start a new batch of pickles or plug in a few bits of veggies to keep the bacteria colony going. Cover the crock with cheesecloth and set at room temperature for a day. If not using within 24 hours, cover with plastic wrap and refrigerate. Bring to room temperature and massage with your clean hands before making your next batch of pickles. Handled properly, with salt and water replenished as needed, this bran mixture will only get better with time. You’ll be able to pass it along to a loved one!
Ingredients you will need![Pickles]() Pickles
Pickles![Water]() Water
Water![Bran]() Bran
Bran![Salt]() Salt
Salt![Wrap]() Wrap
Wrap
Equipment you will use![Plastic Wrap]() Plastic Wrap
Plastic Wrap![Cheesecloth]() Cheesecloth
Cheesecloth


Ingredients
177milliliters![handcrafted beer (ale or lager), at room temperature]() handcrafted beer (ale or lager), at room temperature907grams
handcrafted beer (ale or lager), at room temperature907grams![bran (rice, wheat, or oat)]() bran (rice, wheat, or oat)1inch
bran (rice, wheat, or oat)1inch![fresh ginger, cut into small chunks]() fresh ginger, cut into small chunks3strips
fresh ginger, cut into small chunks3strips![dried kelp (optional)]() dried kelp (optional)59milliliters
dried kelp (optional)59milliliters![miso (optional)]() miso (optional)473milliliters
miso (optional)473milliliters![vegetables (small root vegetables, pickling cucumbers, baby onions, cauliflower florets, asparagus, green beans, and ginger), for pickling]() vegetables (small root vegetables, pickling cucumbers, baby onions, cauliflower florets, asparagus, green beans, and ginger), for pickling177milliliters
vegetables (small root vegetables, pickling cucumbers, baby onions, cauliflower florets, asparagus, green beans, and ginger), for pickling177milliliters![unrefined fine sea salt]() unrefined fine sea salt118milliliters
unrefined fine sea salt118milliliters![Vegetable scraps (about , for jump-starting the bran mixture]() Vegetable scraps (about , for jump-starting the bran mixture591milliliters
Vegetable scraps (about , for jump-starting the bran mixture591milliliters![nonchlorinated water]() nonchlorinated water
nonchlorinated water
 handcrafted beer (ale or lager), at room temperature907grams
 bran (rice, wheat, or oat)1inch
 fresh ginger, cut into small chunks3strips
 dried kelp (optional)59milliliters
 miso (optional)473milliliters
 vegetables (small root vegetables, pickling cucumbers, baby onions, cauliflower florets, asparagus, green beans, and ginger), for pickling177milliliters
 unrefined fine sea salt118milliliters
 Vegetable scraps (about , for jump-starting the bran mixture591milliliters
 nonchlorinated water
DifficultyExpert
Ready In120 hrs
Servings8
Health Score100
Magazine

Your Inner Chef with Taylor Swift's Top 3 Recipes from Her Beloved NYC Hangout

20 Mouthwatering Recipes You Need to Try Today!

Master the Art of Making Perfect Pancakes with This Foolproof Recipe

The Science Behind Red Wine: Its Surprising Health Benefits and Potential Risks

12 Wine Cocktails for a Sophisticated Twist

Sip, Swirl, and Celebrate: Toasting to National Wine Day on May 25th

National Drink Wine Day on February 18

Celebrating Souffle Day with Delectable Delights

Indulge in the Delightful Flavor of Oyster Soup on Its Special Day!

Celebrating World Nutella Day

10 Slow Cooker Recipes to Keep You Warm and Cozy in January

10 Delicious and Refreshing Cocktail Recipes for January!

Stay Cozy and Warm with These Delicious Winter Recipes
Rainbow Food by Colors for a Nutrient-Rich and Vibrant Diet
The Future of Nutritionthe New and Improved Food Pyramid

Food Pyramids from Different Cultures
Decoding the Keto Food Pyramid for Optimal Weight Loss and Health

Understanding the Science Behind the Keto Diet
Secrets of the Food Pyramid: A Journey Through its Intriguing History

A Collection of 15 Noodle Soup Recipes to Warm Your Soul
Your Inner Chef with Taylor Swift's Top 3 Recipes from Her Beloved NYC Hangout
20 Mouthwatering Recipes You Need to Try Today!
Sip, Swirl, and Celebrate: Toasting to National Wine Day on May 25th
National Drink Wine Day on February 18
Indulge in the Delightful Flavor of Oyster Soup on Its Special Day!

These Super Recipes for Your Football Party!
The Secrets Behind 3 Classic Comfort Food Recipes

Celebrate National Pizza Day on February 9th with Mouthwatering Slices and Fun Facts

Recipes to Spice Up Your February Menu