Chocolate Butler
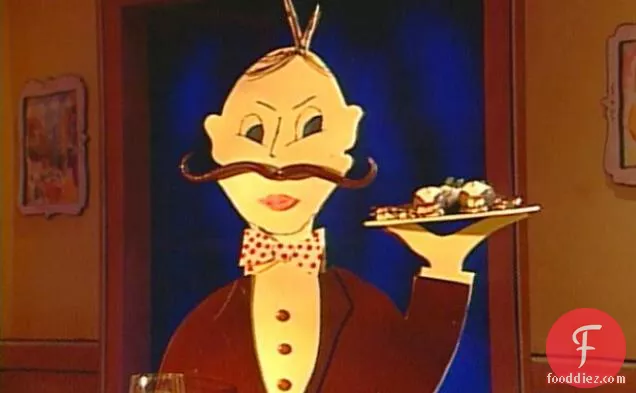
Chocolate Butler might be just the main course you are searching for. This gluten free and dairy free recipe serves 10. One portion of this dish contains approximately 29g of protein, 190g of fat, and From preparation to the plate, this recipe takes approximately 4 hours. A mixture of chocolate, milk chocolate, powdered food coloring, and a handful of other ingredients are all it takes to make this recipe so flavorful. To use up the vegetable oil you could follow this main course with the Blueberry Coffee Cake #SundaySupper as a dessert.
Instructions
1
There are a few things you can do in advance to make this centerpiece easier to make. Draw the butler design on a piece of paper. Take the original to a copy shop and have it enlarged to the size you would like to make. This will be as a template for the butler base and the butler's body. My butler was 10-inches wide and 26-inches tall. You may wish to transfer the design onto foam board.
Ingredients you will need![Base]() Base
Base
2
Cut around the silhouette of the butler. Make the butler base and the butler body: Use an offset spatula to spread a 1/4-inch-thick layer of tempered dark chocolate over a large sheet of acetate or several pieces of parchment paper. When the chocolate begins to set, use a sharp paring knife to trace around the silhouette. When the chocolate is set, peel off the acetate or paper. Repeat this using white chocolate. Tip: Making the base and body thicker than 1/4-inch will make it easier to handle and less likely to break.
Ingredients you will need![White Chocolate]() White Chocolate
White Chocolate![Dark Chocolate]() Dark Chocolate
Dark Chocolate![Chocolate]() Chocolate
Chocolate![Base]() Base
Base
Equipment you will use![Baking Paper]() Baking Paper
Baking Paper![Offset Spatula]() Offset Spatula
Offset Spatula![Knife]() Knife
Knife
3
Pour tempered dark chocolate onto the dark chocolate butler.
Ingredients you will need![Dark Chocolate]() Dark Chocolate
Dark Chocolate
4
Place the white chocolate butler on top of this piece. Press gently. Use an X-acto knife to cut the template into the pieces. My template was cut into 6 pieces: a head, the hand, a bowtie, the body with arm, a shirt and the lapels. These pieces are used to "dress" the butler and to give him the chocolate accents. Make the coat and lapels: Use an offset spatula to spread a 1/4-inch-thick layer of tempered dark chocolate over a large sheet of acetate or several pieces of parchment paper. When the chocolate begins to set, use a sharp paring knife to trace around the coat and the lapels. The side of the chocolate that touches the acetate will be the finished side so, remember to use the reverse side of the template. When the chocolate is set, peel off the acetate or paper. Make the bowtie and shirt: Use an offset spatula to spread a 1/4-inch-thick layer of tempered white chocolate onto a piece of acetate. When the chocolate begins to set, use a sharp paring knife to trace around the bowtie and the shirt. The side of the chocolate that touches the acetate will be the finished side so, remember to use the reverse side of the template. When the chocolate is set, peel off the acetate or paper. Use a paintbrush to apply red dots onto the bowtie.
Ingredients you will need![White Chocolate]() White Chocolate
White Chocolate![Dark Chocolate]() Dark Chocolate
Dark Chocolate![Chocolate]() Chocolate
Chocolate![Spread]() Spread
Spread
Equipment you will use![Baking Paper]() Baking Paper
Baking Paper![Offset Spatula]() Offset Spatula
Offset Spatula![Knife]() Knife
Knife
5
Make the buttons: Use a cornet filled with tempered milk chocolate and pipe rounds of chocolate onto a piece of acetate.
Ingredients you will need![Chocolate]() Chocolate
Chocolate
6
Let the chocolate set. My butler had 1 large button and 3 smaller buttons. Use the tip of a sharp knife to mark the holes in each button. Use tempered chocolate to glue the buttons into place. Make the lips and mustache: Use modeling chocolate to form the lips and mustache.
Ingredients you will need![Modeling Chocolate]() Modeling Chocolate
Modeling Chocolate![Chocolate]() Chocolate
Chocolate
Equipment you will use![Knife]() Knife
Knife
7
Add a drop of red food coloring to a small piece of white molding chocolate and work in the color until it is pink. Form the lips. Use dark modeling chocolate to form the mustache. Make the base: Use flexible aluminum strips or very large cake ring to form a base. The base I made was 13 inches in diameter.
Ingredients you will need![Modeling Chocolate]() Modeling Chocolate
Modeling Chocolate![Red Food Color]() Red Food Color
Red Food Color![Chocolate]() Chocolate
Chocolate![Base]() Base
Base
1
Roll a piece of acetate into a tube that is 11 1/2 inches long and 3 inches in diameter and tape it closed. Set the tube on end and fill with dark chocolate. When it is full, invert the tube over the bowl of chocolate allowing the excess chocolate to flow back into the bowl.
Ingredients you will need![Dark Chocolate]() Dark Chocolate
Dark Chocolate![Chocolate]() Chocolate
Chocolate![Roll]() Roll
Roll
Equipment you will use![Bowl]() Bowl
Bowl
2
Let set. When the chocolate has set, repeat this step a few more times. You want the tube to be sturdy because the butler will rest against it. Allow the chocolate tube to set until hard.
Ingredients you will need![Chocolate]() Chocolate
Chocolate
3
Remove the acetate. Use a hot knife to trim the base of the tube so it is flat. Then use the knife to scar the bottom. You want to make it somewhat textured so it will form a better seal to the base. Use tempered chocolate to glue the pole onto the base. Position it well so you can rest the molded chocolate against it. Make the tray: Use an offset spatula to spread a 1/4-inch-thick layer of tempered chocolate over a sheet of parchment paper.
Ingredients you will need![Chocolate]() Chocolate
Chocolate![Base]() Base
Base
Equipment you will use![Baking Paper]() Baking Paper
Baking Paper![Offset Spatula]() Offset Spatula
Offset Spatula![Knife]() Knife
Knife
4
Let the chocolate set slightly. Use a paring knife to trace around an 8-inch cake circle. When the chocolate is set, peel off the acetate. Finishing the details: Paint the eyes, eyebrows, chin and nose outline onto the face of the butler. You can also add some lines on his hand to give it a sense of action. Fill a cornet with milk chocolate and use it to paint hair on the butler's head. Use tempered chocolate to glue all of the pieces into place. Start with the coat.
Ingredients you will need![Chocolate]() Chocolate
Chocolate
Equipment you will use![Knife]() Knife
Knife
5
Place some tempered chocolate directly onto the butler under the coat piece.
Ingredients you will need![Chocolate]() Chocolate
Chocolate
6
Add the shirt. Then add the lapels. Use tempered chocolate to glue the bow tie into place.
Ingredients you will need![Chocolate]() Chocolate
Chocolate
7
Add the lips and mustache into place. Use a pastry brush to gloss the butler's coat with some vegetable oil. This will make his coat shiny. Stand the butler on end and adhere him to the base with tempered chocolate by resting the butler against the support pole. Use a hot knife to make a 90-degree indentation in the butler's hand and on the tray. Use these notches as a guide and adhere the tray into place with more tempered chocolate.
Ingredients you will need![Vegetable Oil]() Vegetable Oil
Vegetable Oil![Chocolate]() Chocolate
Chocolate![Base]() Base
Base
Equipment you will use![Pastry Brush]() Pastry Brush
Pastry Brush![Knife]() Knife
Knife


DifficultyExpert
Ready In4 hrs
Servings10
Health Score30
Related recipes
Turkey with Country Ham Stuffing
Party Italian Wedding Soup
Turkey Alfredo Tetrazzini
Stuffed Shells with Meat Sauce
Magazine

Your Inner Chef with Taylor Swift's Top 3 Recipes from Her Beloved NYC Hangout

20 Mouthwatering Recipes You Need to Try Today!

Master the Art of Making Perfect Pancakes with This Foolproof Recipe

The Science Behind Red Wine: Its Surprising Health Benefits and Potential Risks

12 Wine Cocktails for a Sophisticated Twist

Sip, Swirl, and Celebrate: Toasting to National Wine Day on May 25th

National Drink Wine Day on February 18

Celebrating Souffle Day with Delectable Delights

Indulge in the Delightful Flavor of Oyster Soup on Its Special Day!

Celebrating World Nutella Day

How to Make Sushi
How to Make Vegan Pasta
19 Avocado Recipes So You Never Waste One Again
21 Cabbage Recipes to Eat Every Night of the Week

14 Fantastic Cucumber Recipes for Your late Summer

16 Healthy Kale Recipes

23 Spinach Recipes You'll Want to Eat Every Day
8 Watermelon Recipes You'll Crave

10 Ways to Use Leftover Eggplant

All You Need to Know about Traditional Vietnamese Food
Your Inner Chef with Taylor Swift's Top 3 Recipes from Her Beloved NYC Hangout
20 Mouthwatering Recipes You Need to Try Today!
Sip, Swirl, and Celebrate: Toasting to National Wine Day on May 25th
National Drink Wine Day on February 18
Indulge in the Delightful Flavor of Oyster Soup on Its Special Day!

These Super Recipes for Your Football Party!
The Secrets Behind 3 Classic Comfort Food Recipes
Recipes to Spice Up Your February Menu
Top 20+ Must-Try Recipes Dominating February 2024